Developing for Grasshopper in C#: Find the class for any Grasshopper component

Grasshopper components showing how the C# component can be used to access the namespace of component classes

When developing for Grasshopper, it is useful to be able to interact programatically with existing components.

The current SDK has patchy documentation and finding where and how to interact with different components can be challenging.

The script below can be used to find the namespace and class for any component. Use a default C# component. Set the first input (x) as a list, and connect your components to this.

    Grasshopper.Kernel.IGH_Param selNumsInput = Component.Params.Input[0];
    IList<Grasshopper.Kernel.IGH_Param> sources = selNumsInput.Sources;
    bool isAnythingConnected = sources.Any();
    var rtnlist = new List<object>();

    if(isAnythingConnected)
    {
      foreach (var source in sources)
      {
        IGH_DocumentObject component = source.Attributes.GetTopLevel.DocObject;
        rtnlist.Add(component.Attributes);
      }
    }
    A = rtnlist;

Once you have these namespaces, you can then dig into these components and access a wide range of properties. It’s quite fun to see what you can do with them.

Mesh line intersections in Grasshopper in C#

Many intersection checks are possible in C# in Grasshopper, although finding them isn’t entirely intuitive.

One task I wanted to do today was to see if a ray of light between one point and another was being blocked by a mesh. This requires a mesh-line intersection check – to check if the ray of light was being blocked by the mesh.

How to calculate an intersection

You can find a lot of intersection methods for different kinds of geometry under Rhino.Geometry.Intersection. The mesh line intersection is a good choice as it is one of the faster intersection checks – especially compared to anything involving surfaces.

To do the intersection check, we need our mesh and our ray. The ray can be a bit challenging to set up – it’s a common mistake to forget to realise that your line start and end points might be touching the mesh, which would lead to positive intersection results. This is why I’ve redefined my line to run from 0.001 to 0.999.

        //collision test
        var ln = new Line(e[em], centre); //ray
        var startpt = new Point3d(ln.PointAt(0.001)); //modify ray so start/end don't intersect
        var endpt = new Point3d(ln.PointAt(0.999));
        ln.From = startpt;
        ln.To = endpt;
        Int32[] intersections; //where intersection locations are held
        Rhino.Geometry.Intersect.Intersection.MeshLine(r, ln, out intersections);

        //calculate emission contribution and add to that receiver
        if(intersections == null)
        {
          //if no intersections, we can assume ray is unimpeded and do our calcs
          double contribution = Math.Cos(alpha) / (dist * dist);
          rtnvals[f] += Math.Max(contribution, 0);
        }

Area of a mesh face in C# in Grasshopper

Another quick script for handing meshes – this time to find the area of a mesh face.

This script is in C# and can be easily used with the C# component in Grasshopper. Copy the script into the ‘custom additional code’ section. It is written as a method, so you can easily call it. In the ‘RunScript’ section, call the method with something like:

double area = Area(3, myMesh)

This will return the area of the third face in the mesh called myMesh.

The method itself to calculate the area of a mesh face is below. Of course, you can use this method in any C# application, not just Grasshopper – you’ll just need to modify the code to fit whatever data structure your mesh uses.

  double Area(int meshfaceindex, Mesh m)
  {
    //get points into a nice, concise format
    Point3d[] pts = new Point3d[4];
    pts[0] = m.Vertices[m.Faces[meshfaceindex].A];
    pts[1] = m.Vertices[m.Faces[meshfaceindex].B];
    pts[2] = m.Vertices[m.Faces[meshfaceindex].C];
    if(m.Faces[meshfaceindex].IsQuad) pts[3] = m.Vertices[m.Faces[meshfaceindex].D];

    //calculate areas of triangles
    double a = pts[0].DistanceTo(pts[1]);
    double b = pts[1].DistanceTo(pts[2]);
    double c = pts[2].DistanceTo(pts[0]);
    double p = 0.5 * (a + b + c);
    double area1 = Math.Sqrt(p * (p - a) * (p - b) * (p - c));

    //if quad, calc area of second triangle
    double area2 = 0;
    if(m.Faces[meshfaceindex].IsQuad)
    {
      a = pts[0].DistanceTo(pts[2]);
      b = pts[2].DistanceTo(pts[3]);
      c = pts[3].DistanceTo(pts[0]);
      p = 0.5 * (a + b + c);
      area2 = Math.Sqrt(p * (p - a) * (p - b) * (p - c));
    }

    return area1 + area2;
  }

This script is based upon Heron’s Formula, which calculates the area of a triangle based upon knowing its three lengths. The script also calculates the area for quads. It does this by dividing the quad into two triangles.

mesh-area

C# code for getting the centrepoint of a mesh face in Grasshopper

A method I quickly wrote to get the centrepoint of a mesh face using the C# component in Grasshopper. More information about the mesh data structure used to generate this code is in this post.

The method essentially calculates the ‘average’ location of each of the 3 or 4 nodes on the mesh. (Formally, this is a simplification of the first moment of area.)

  Point3d CentrePoint(int meshfaceindex, Mesh m)
  {
    var temppt = new Point3d(0, 0, 0);

    temppt.X += m.Vertices[m.Faces[meshfaceindex].A].X;
    temppt.Y += m.Vertices[m.Faces[meshfaceindex].A].Y;
    temppt.Z += m.Vertices[m.Faces[meshfaceindex].A].Z;

    temppt.X += m.Vertices[m.Faces[meshfaceindex].B].X;
    temppt.Y += m.Vertices[m.Faces[meshfaceindex].B].Y;
    temppt.Z += m.Vertices[m.Faces[meshfaceindex].B].Z;

    temppt.X += m.Vertices[m.Faces[meshfaceindex].C].X;
    temppt.Y += m.Vertices[m.Faces[meshfaceindex].C].Y;
    temppt.Z += m.Vertices[m.Faces[meshfaceindex].C].Z;

    if(m.Faces[meshfaceindex].IsQuad)
    {
      temppt.X += m.Vertices[m.Faces[meshfaceindex].D].X;
      temppt.Y += m.Vertices[m.Faces[meshfaceindex].D].Y;
      temppt.Z += m.Vertices[m.Faces[meshfaceindex].D].Z;

      temppt.X /= 4;
      temppt.Y /= 4;
      temppt.Z /= 4;
    }
    else
    {
      temppt.X /= 3;
      temppt.Y /= 3;
      temppt.Z /= 3;
    }

    return temppt;
  }

It’s sloppy to have the code so repetitive, but the .A and the .X notation don’t make for good code efficiency. It’s sometimes possible to use temppt[d] where d = 0, 1 or 2 for X, Y and Z correspondingly (which would allow the use of a ‘for’ loop), but the mesh Vertices property returns Point3f instead of Point3d, which doesn’t allow this.

Where do I publish my first scientific paper?

Coming up to two years in my research journey in my Engineering Doctorate, the time is already overdue for me to publish my first paper. Scientific papers that want to be held in the highest esteem should be published in a peer-reviewed journal.

With support from my supervisor and colleagues, I am now starting to look into the process. With a few ideas on the go, each I believe worthy of eventually becoming a paper, a key question is which journal to target.

An obvious starting point is to look at the literature related to my work, and see where they have been published. Scanning through my Mendeley library, four journals seem to stand out:

Reading through the scope of these journals reveals a lot of overlap, which doesn’t do much for helping to narrow down my options. I can’t necessarily just submit a paper to all of them, hoping for one of them to accept my paper – this simply isn’t allowed. So I need to be selective about which journal I submit my paper to.

Impact factor

Not all journals are created equally, and naturally I want to choose a journal with a strong reputation. A key measure of journal reputation is the Impact Factor, which is basically the average number of citations each paper in the journal receives. SciJournal provides a quick way of looking up the Impact Factor for various journals in recent years, so I took a look for the four above:

2008 2009 2010 2011 2012 2013-2014
Energy and Buildings 1.59 1.593 2.041 2.386 2.679 2.465
Building and Environment 1.192 1.797 2.129 2.4 2.43 2.7
Automation in construction 1.664 1.372 1.311 1.5 1.82 1.822
Energy 1.712 2.952 3.565 3.487 3.651 4.159

‘Energy’ clearly stands out as the journal with the strongest impact, but it is also the most general of the four journals. The most impactful journals may be more competitive, and with the review process taking many months, I want to minimise the chances of my paper being rejected. While I want to aim high, it’s better to have a paper in a middling journal than not published at all.

SJR

Another interesting site to browse is SCImago Journal and Country Rank, which provides more in-depth information and rankings. Looking at the Buildings and Construction category, Energy and Buildings comes 7th based on their SJR metric. (Note that it’s a Spanish site, so commas are decimal points, and full stops are thousand separators!) The 6 superior journals aren’t relevant, so this journal is looking promising. ‘Energy’ doesn’t appear in this category, as expected. ‘Building and Environment’ comes 13th, while ‘Automation in Construction’ trails in at 18th.

The advantage of scanning tables like this is that it can expose journals that may have been missed in the literature review. Building Research & Information comes in at 17th on this SJR table, having relevance to me in terms of building performance. The Journal of Building Performance Simulation is at 24th, but it is a newer journal and is rising quite quickly year on year.

How to colour a mesh using the C# component in Grasshopper

In this post, we saw how you can apply colours to a mesh using Grasshopper components.

Sometimes we would rather use C# code – in certain cases it can be a lot faster than clicking around the Grasshopper canvas, and it can give us a lot more control. How can we apply colour to a mesh using C#?

How coloured meshes work in Grasshopper

If we understand the mesh structure in Grasshopper, we know that meshes are defined by nodes and faces. We create a list of nodes, and then ‘join them up’ into faces of 3 or 4 nodes.

When we colour a mesh in Grasshopper, we do not colour the faces themselves. Instead, we set each node to a colour. So, if we have a simple mesh of one face and four nodes, we must define four colours, one for each node.

We can set the same colour to every node to get a uniform colour. But a nice thing that we can do is set different colours to each node. Rhino will automatically render the mesh with smooth colour gradients – nice!

As an aside, if you want one uniform colour per face, as in the second example here, we must again explode the mesh into multiple meshes, one per face. Alternatively, instead of exploding, you could duplicate the nodes at points where faces of different colours meet.

An example

Let’s say you want to create a mesh with a 3-colour gradient of red, yellow and green, as below:

Grasshopper mesh 3 colour gradient

We can create this with a mesh of 2 faces and 6 nodes. Create a C# component within Grasshopper with default input/outputs, and copy the code below:

    //declare an empty mesh
    var mesh = new Mesh();

    //create vertices
    mesh.Vertices.Add(0, 0, 0);
    mesh.Vertices.Add(5, 0, 0);
    mesh.Vertices.Add(5, 2, 0);
    mesh.Vertices.Add(0, 2, 0);
    mesh.Vertices.Add(10, 0, 0);
    mesh.Vertices.Add(10, 2, 0);

    //create colour list. The vertex [i] is coloured by the value at VertexColors[i]
    //the VertexColors list MUST be the same length as the vertices list
    mesh.VertexColors.Add(Color.Red);
    mesh.VertexColors.Add(Color.Yellow);
    mesh.VertexColors.Add(Color.Yellow);
    mesh.VertexColors.Add(Color.Red);
    mesh.VertexColors.Add(Color.Green);
    mesh.VertexColors.Add(Color.Green);

    //create faces using vertex indices
    mesh.Faces.AddFace(0, 1, 2, 3);
    mesh.Faces.AddFace(1, 4, 5, 2);

    //return mesh
    A = mesh;

A few notes

The colours are saved as a list in VertexColors. Note that this list must either be completely empty (if you are not interested in colouring your mesh) or it should be exactly the same length as the Vertices list. Fail to do this, and your mesh will have a nasty habit of disappearing with no word of warning!

Since VertexColors is a list, once you have added colours, you can edit them in the usual way with VertexColors[i] where i is some index number. But, like a list, you cannot add a new colour using VertexColors[i] – you must use the VertexColors.Add() method.

Colours are normally defined using RGB values, for example:

Mesh.VertexColors.Add(255,0,0);

But a useful shortcut if you don’t know/can’t be bothered to look up colour codes is to use shortcuts like Color.Red instead of RGB values.

Should I use Adsense on my site? My first impressions

Regular visitors of this blog may have noticed that, a while back, Adsense adverts have started to appear in the right-hand column.

So, firstly, an apology. I put them there, I chose to put them there, and I am sorry for subjecting the People of the Internet to yet more garish and annoying advertising.

But that’s not to say that I put them there for financial reasons. It’s going to be a long time before I can ever make a website with enough traffic for me to retire early with a yacht and a mansion (at least on advertising money alone). The reason is more one of curiosity – with seemingly every website under the sun selling every spare pixel as advertising space, there has to be something in it, right? (Have you been on sites like lifehacker recently? Talk about shameless!) So, with a website with a steady, if modest, amount of traffic at my disposal, I decided to Do Some Science and sign up for Adsense.

Setting up AdSense

Adsense is pretty easy to set up if you have a website or a WordPress blog. Each ad is created by an ad unit, which essentially is a few lines of code you copy into your page’s html. If it’s the first time you have added ads to a website, the application process involves submitting your website address to check if it meets their content guidelines.

This process unfortunately takes a few days while you are left out in the cold as to where you are in the approval process – all you can do is wait. When you finally get the confirmation email, you can start to create ad units and put them on your site. These first ad units also take a few hours to appear on your site, so you don’t know immediately whether you have done it right.

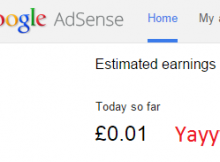
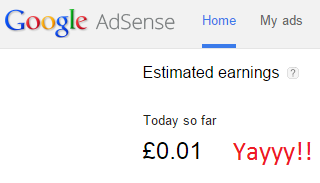
After all this waiting around, the sense of achievement I got when I finally saw my first ad appearing on my site was quite remarkable!

A crash course in AdSense

Like I say, I never expect AdSense to deliver enough money to make me rich, or even to provide enough money to be equivalent to be a part-time job – a bit of pocket money at best. Even in these ambiguous terms, I had no idea how much I might actually earn.

The key metric of revenue in AdSense is RPM, or revenue per 1000 views. This is the money you make, divided by the number of views, times 1000, and this is normally calculated on a day-by-day basis (although of course you can average it out over longer timeframes). So, in order to calculate your predicted earnings, you can multiply your visitor count by your RPM. You probably know how many visitors you have on your site, so the missing value is your RPM. Find out what the RPM should be, and you can calculate your potential income. Sounds simple, right?

The problem is that the RPM is a difficult number to find out. Ads are sold by Google on an auction basis, and your earnings are based on a percentage of the ad unit sale price. These prices can fluctuate hugely depending on the balance of supply and demand for ad space, the kind of ads that you show, the country (or region) your visitors are from, the placement of your ads, not to mention a huge range of other factors. So when you are considering signing up for AdSense, it’s not much use Googling around for typical RPMs.

A further issue compounding the problem is that there are two sources of income from your ads. You get a small payment for every view and a larger payment for every click. The number of clicks that you get relative to every view is very small (a ratio known as the CTR, the Click-Through Rate) – typically less than 1%, but the payments for clicks are much higher. RPM is calculated based on the sum of views and clicks.

Earning my first penny

adsense

So what is my experience? On days when I get no clicks (which enables me to easily analyse the ‘view’ component of the RPM) I typically get an RPM anywhere between £0.05 to £0.50. The fluctuations seem to be heavily dependent upon the countries the views come from. Higher payments tend to come from views in English-speaking countries, especially the US. At the other end of the scale, views from the Middle East and India tend to generate almost nothing. Perhaps surprisingly, views from Japan generate very poor RPMs too. It comes down to the countries where Google are most able to sell adverts at a higher price – which arguably is easier both when the country has a stronger economy (it is more compelling for advertisers to buy adverts in a country where its residents have disposable income for overpriced holiday breaks) and where Google is already well-established as the go-to for online advertising. (I seem to recall for example that Yahoo is the internet company of choice in Japan, not Google.)

What about when I do get a click? These are quite uncommon compared to views. I currently have 1153 views registered and 3 (yes, three!) clicks – a CTR of 0.26%. Wow!!

However, it’s the income we’re really interested in. Based on n=3 (you’ve come to the right place if you want robust. statistically-sound Science), the average cost per click is £0.55 each. However, one click came in at £0.15 while another came in at over £1.00, so considering an average can be almost meaningless unless traffic is really high. My total income (clicks and views) is £1.92, so it’s obvious that clicks clearly hold more value, even when they are very infrequent.

In total, my lifetime RPM is £1.67. But filter out the clicks, and the views contribute only an RPM of £0.32.

Should I use Adsense then?

It’s becoming clear why websites have a nasty reputation of encouraging ‘accidental’ clicks. The AdSense conditions prohibit layouts and behaviours that encourage this (which makes sense – accidental clicks have no value to the advertiser and will eventually reduce the how much companies are willing to bid for clicks). It’s nice that there are two revenue streams within AdSense, but by my reckoning the ‘views’ component is almost worthless.

Furthermore, number of views reported in AdSense is much lower than the views reported in Jetpack, the free tool I use for site stats of this blog. Assuming Jetpack is reliable (which I can’t be completely sure about) the most likely candidate for this discrepancy might be AdBlock, a hugely popular tool for users to block ads showing on websites. This is maybe a blog post for the future, but the lost potential income in this discrepancy is something to consider.

How do these RPM values compare with information on other sites? Reliable information can be a little hard to come by since the internet is awash with dodgy consultants promising to you that elusive yacht and mansion if you buy their overpriced eBook. (Often, these sites themselves have AdSense advertising – or website that make money by Adsense by generating views by telling people how to make money by Adsense!) A few sources that seem to ring true for me include this one, which claims a RPM of $1 to $10 (£0.70 to £7.00) for content-rich sites and blogs. (Notice the large range again!)

Bear in mind that I have done absolutely no optimisation work on my AdSense. The content on my website is mostly difficult to monetise. Google’s algorithms choose adverts to display on your site based upon its content (see here). A website with reviews on hotels is likely going to deliver much higher RPMs since everyone researches and books hotels online nowadays. If your site offers products rather than information, there may be something in it for you.

But, if you are going to make money by promoting ways for people essentially to spend their money online, it might make more sense to look at affiliate programmes. Affiliate programmes are basically commission-based programmes where companies pay you directly if you directly point someone towards their site and they buy something. This blog post gives an example of such a site that increased their income with this method.

So in conclusion, what does that mean? If your site provides information, then you probably won’t earn much. If your site provides products, then there may be better ways of making money. So why use AdSense at all? I think the answer is that it’s easy money. It may not be much, but if you already have a site that has a decent amount of traffic, you can get a steady source of income with minutes of work (at least, once you know what you’re doing).

What next?

Will I keep AdSense on my blog? Now I have a couple of £s built up in my AdSense account, I feel it’s a small matter of pride not to lose it. Bear in mind that there are minimum payout thresholds – i.e. your account needs to hit a certain limit before Google will send you a payment. I will probably be an old man before I get to the £60 threshold, but I would feel a pain if I closed my AdSense account and went back to ad-free blogging, knowing that Google had made money from their defacement of my site without me getting my own share of the takings.

And as long as I keep the ads going, I am building up more data and getting a better understanding of the rewards of AdSense.

So, in the name of Science, should I keep going? I can’t decide.

Calculate the cross product: C# code

A method written in C# for calculating the cross product between two vectors:

  Vector3d CrossProduct(Vector3d v1, Vector3d v2)
  {
    double x, y, z;
    x = v1.Y * v2.Z - v2.Y * v1.Z;
    y = (v1.X * v2.Z - v2.X * v1.Z) * -1;
    z = v1.X * v2.Y - v2.X * v1.Y;

    var rtnvector = new Vector3d(x, y, z);
    rtnvector.Unitize(); //optional
    return rtnvector;
  }

The cross product enables you to find the vector that is ‘perpendicular’ to two other vectors in 3D space. The magnitude of the resultant vector is a function of the ‘perpendicularness’ of the input vectors.

Read more about the cross product here.

FastMesh for Grasshopper: A cluster to make fast, light meshes from curves

Creating a mesh from a curve can be challenging in Grasshopper. Most ways of doing it involve creating a surface and then meshing that surface. And once the mesh is made, it often has inconsistent face densities, with unusual points of high point density.

bad_mesh

The mathematics behind these methds are fine for the general case (any closed curve in any alignment), but in cases where we have a planar polyline (i.e. no curved segments, such as a room or building outline) and where this curve lies in the XY plane, we can use a highly optimised algorithm.

FastMesh is my attempt. Simply connect a polyline (or list of polylines) and it will mesh those curves – without the heavy operation of creating intermediary surfaces. I have attempted to ensure that points are distributed evenly in a grid-like pattern (so it is suitable for creating analysis meshes for tools like Honeybee), and you can optionally control the distance between points by inputting a distance into ‘s’. If you leave ‘s’ blank (or set it to 0) it will create a mesh with a minimum number of faces, creating extremely light meshes, for example in creating buildings with Elk.

good_mesh

The principle of my method is that it generates a collection of mesh points, and removes any mesh points that don’t lie inside the curve. It then performs a Delaunay Triangulation on remaining points. For concave shapes, triangles will be formed that fall outside the curve, which are removed.

Grasshopper: Front and Centre for aligning legends to the Rhino Viewport

Grasshopper is a great way of creating legends and graphs beside your model, but how do you display them? You can use multiple viewports, but this is clumsy to set up. You could use Ladybug’s approach of keeping the legend close to your geometry in 3D space, but this means you have to move the viewport to inspect the legend.

legend1

Front and Centre is a Grasshopper cluster which moves legends or any other geometry directly in front of the camera. Add a timer and the legend automatically follows the camera. It intelligently scales the geometry to fit within the screen, and you can customise the location by modifying a centre point.

legend2

To use, connect the legend or geometry you wish to display to ‘Geo’. Optionally, you can add a point to define the centre of your screen to ‘pt’. Both these should be located somewhere in the plane Z=0.

frontandcentre