Open and run Grasshopper from a batch file

How to automatically open Rhino and run a Grasshopper file using a batch file.

A batch file is a file that allows Windows to run a list of commands automatically. They are simple text files with file extension .bat that you can easily write yourself. This post is a good tutorial on how to make a batch file.

Batch files were used in the Pollination project in Grasshopper to automate Grasshopper tasks between multiple computers. Andrew Heumann explained here how to write the batch file to start Rhino and run a Grasshopper file.

What to write in the Grasshopper batch file

Copy this into a text document, and change the fields to your own file locations. Save the file, and change the extension from .txt to .bat.

@ECHO OFF
cd **PATH TO DIRECTORY CONTAINING GH FILE**
"**PATH TO RHINO.EXE**" /nosplash /runscript="-grasshopper editor load document open **GRASSHOPPER FILE NAME** _enter" "**PATH TO ASSOCIATED RHINO FILE**"

For example, I have a Rhino and a GH file on my desktop, respectively called random.gh and random2.3dm.

@ECHO OFF
cd C:\Users\jrams\Desktop
"C:\Program Files\Rhinoceros 5 (64-bit)\System\rhino.exe" /nosplash /runscript="-grasshopper editor load document open C:\Users\jrams\Desktop\random.gh _enter" "C:\Users\jrams\Desktop\random2.3dm"

Now you can just double-click on the batch file you have made. Rhino should now open with your Grasshopper file.

Seeing an error with the characters ╗┐?

The ECHO OFF command should stop the command prompt from being visible. Sometimes, you might get an error like this. This error stops the first line in your batch file from being executed properly, in this case disabling the ECHO OFF command.

batch file BOM error

Long story short, your text file’s encoding is incompatible with the command prompt. To fix, in Notepad, save with ANSI encoding. Or in Sublime, go to File then Save With Encoding. Choose UTF-8 (NOT UTF-8 with BOM).

Grasshopper: Where is Grasshopper.dll and GH_IO.dll?

When developing Grasshopper components, we need to make reference to two Grasshopper Dlls: Grasshopper.dll and GH_IO.dll. These provide the GH_Component class, which custom components inherit from, as well as providing other useful Grasshopper functions.

Grasshopper.dll and GH_IO.dll

The exact location depends upon your particular Rhino installation. On my computer, I found them buried within the AppData folder at:

C:\Users\James\AppData\Roaming\McNeel\Rhinoceros\5.0\Plug-ins\Grasshopper {...}\0.9.76.0

Within this folder, I found a large collection of files, including Grasshopper.dll and GH_IO.dll.

A similar path may exist on your computer. If you can’t find anything like it on yours, you can look up the folder through Rhino: (from David Rutten)

  1. Start Rhino
  2. Run the _PluginManager command
  3. Locate Grasshopper in the list of plugins
  4. Open the properties for the Grasshopper plugin
  5. At the bottom of the Properties window there’s a ‘File name’ entry
  6. This points to GrasshopperPlugin.rhp, which is sitting next to Grasshopper.dll

You may need to widen the window to see the full path.

Grasshopper DLL path

Read and edit persistent data in Grasshopper components with C#

A guide to accessing, reading and editing the persistent data property of Grasshopper components. This guide follows on from this post.

Every input of normal Grasshopper components has the ability to save persistent data. Persistent data is what you see when you right-click on a component and set the input’s value from there. The opposite, data fed into a component from another component, is called volatile data.

In this example, I will take the Circle CNR component. Using techniques borrowed from this post and this post, I am going to create a new CNR component using C#, then modify its persistent data.

circle CNR Grasshopper component

Add persistent data

Firstly, we need to add or reference the component for which we want to modify the persistent data.

Here, I am creating a new instance of Circle_CNR, which is contained within curve.gha.

    //Create the component
    var cs = new CurveComponents.Component_CircleCNR();

    //add the circle centre (input 0)
    var pp = cs.Params.Input[0] as Grasshopper.Kernel.GH_PersistentGeometryParam<Grasshopper.Kernel.Types.GH_Point>;
    pp.PersistentData.ClearData();
    pp.PersistentData.Append(new GH_Point(new Point3d(0, 0, 0)));

    //add the circle radius
    var pn = cs.Params.Input[2] as Grasshopper.Kernel.GH_PersistentParam<Grasshopper.Kernel.Types.GH_Number>;
    pn.PersistentData.ClearData();
    pn.PersistentData.Append(new GH_Number(y)); //y is another variable

Read persistent data

Persistent data is saved as a GH_Structure. This is a tree-like data structure.

The ‘Append’ method above will add the data item to the final branch in the structure. Since we cleared the structure in the line before, there are no branches, so Grasshopper adds the data to a new branch.

So, in order to read our data, we need to access the list contained in branch 0.

    var readpt = cs.Params.Input[0] as Grasshopper.Kernel.GH_PersistentParam<Grasshopper.Kernel.Types.GH_Point>;
    return readpt.PersistentData[0];

A full example

In the manner of this post, here I have a C# component that creates an instance of the CNR component hidden from the user on a dummy document. By modifying the CNR component’s input persistent data, we can modify the properties of the circle. The circle is calculated, and we read the output from the CNR component.

  private void RunScript(double y, ref object A)
  {

    //Create the component
    var cs = new CurveComponents.Component_CircleCNR();

    //add the circle centre (input 0)
    var pp = cs.Params.Input[0] as Grasshopper.Kernel.GH_PersistentGeometryParam<Grasshopper.Kernel.Types.GH_Point>;
    pp.PersistentData.ClearData();
    pp.PersistentData.Append(new GH_Point(new Point3d(0, 0, 3)));

    //add the circle radius (input 2)
    var pn = cs.Params.Input[2] as Grasshopper.Kernel.GH_PersistentParam<Grasshopper.Kernel.Types.GH_Number>;
    pn.PersistentData.ClearData();
    pn.PersistentData.Append(new GH_Number(y)); //y is another variable

    //run calculations
    cs.ExpireSolution(true);

    //add to a dummy document so we can read outputs
    var doc = new Grasshopper.Kernel.GH_Document();
    doc.AddObject(cs, false);

    //read output circle
    cs.Params.Output[0].CollectData();
    A = cs.Params.Output[0].VolatileData.get_Branch(0)[0];

    //remove that component
    doc.RemoveObject(cs.Attributes, false);

  }

circle CNR component C# Grasshopper

Manually expire downstream components in Grasshopper with C#

How does component calculation in Grasshopper work, and how can we control how to expire downstream components in Grasshopper?

The calculation of a Grasshopper canvas is quite complicated. It has to be able to calculate which components need calculating, and the order it does it in.

How Grasshopper does calculations – usually

It does this through a system of ‘expired’ markers. If a component needs calculating, it is marked as ‘expired = true’. It then solves each component marked as expired, one at a time, until all expired components have been calculated. A calculated component can then have its ‘expired’ flag set to false.

A component will be marked as expired if any changes are made to it, for example, it receives a new value in one of its inputs. Furthermore, if a component is marked as expired, by default, every component downstream of this component will also be marked as expired.

This behaviour is quite reasonable in most cases in Grasshopper. It guarantees that all components will be up-to-date, and that each component’s output will be correct according to the latest input values happening upstream. It also ensures that components are not re-calcualted needlessly – only components that need calculating will be recalculated.

What if this behaviour isn’t what I want?

On a rare occasion, this method of component calculation is actually not helpful for us. This usually happens when we are trying to perform another task which is also not in the spirit of Grasshopper workflows.

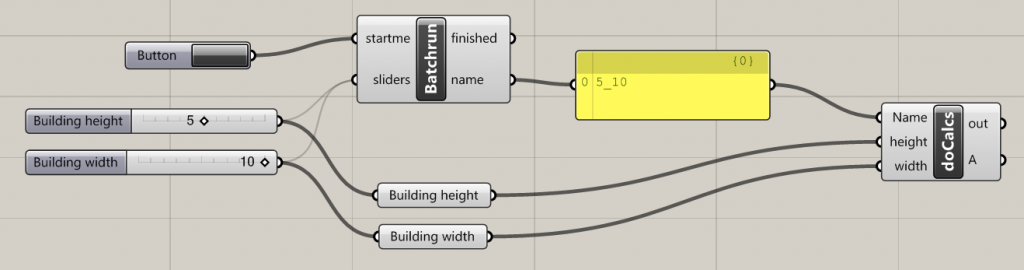
I have recently been working on the BatchRun component to make it more usable in design workflows. This component remotely adjusts sliders on the canvas, allowing a form of iterative workflow not normally possible in Grasshopper.

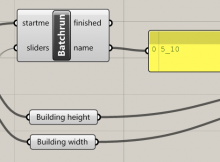
One key feature I needed from BatchRun was that, for every movement of the slider, a new set of geometry would be generated in Grasshopper, and this requires a unique name. The most logical solution is to generate a name from the slider values. So I added a ‘name’ output:

Grasshopper component Batchrun for looping

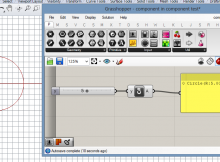
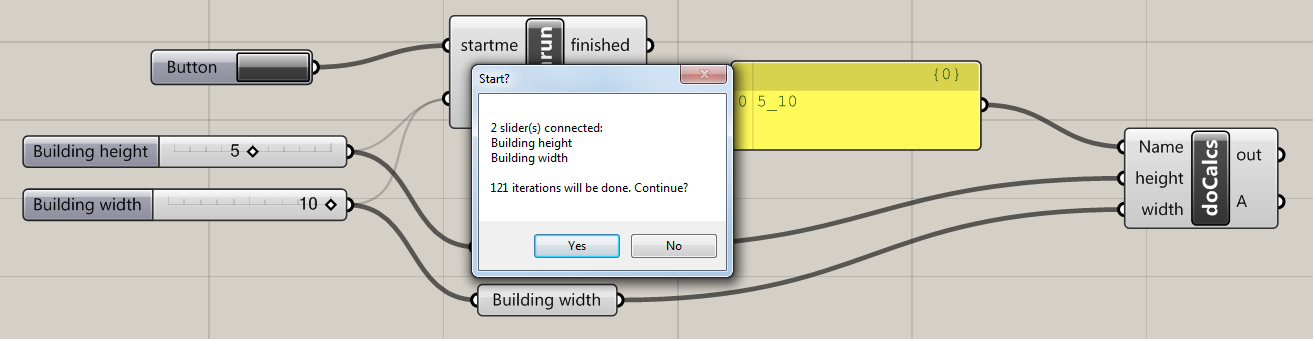
When the user presses ‘startme’, BatchRun will automatically cycle through the sliders. Two sliders, each with 11 values, will produce 121 combinations of the two sliders. To be sure that the user wants to do this possibly time-consuming task, a message box appears:

Grasshopper message box for BatchRun component

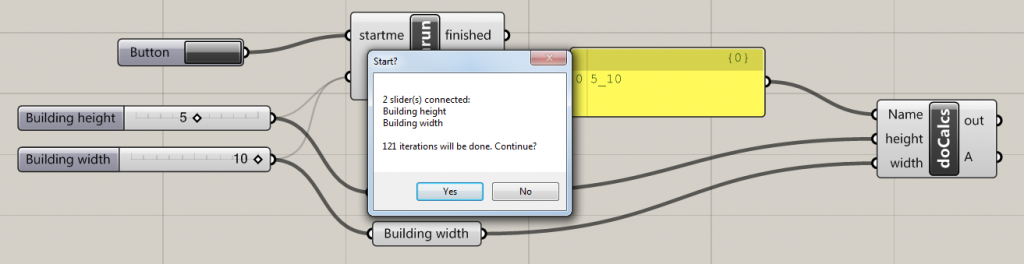
If the user presses ‘yes’, and only when the user presses ‘yes’, Grasshopper should start to iterate through the sliders.

Why wouldn’t this normally work?

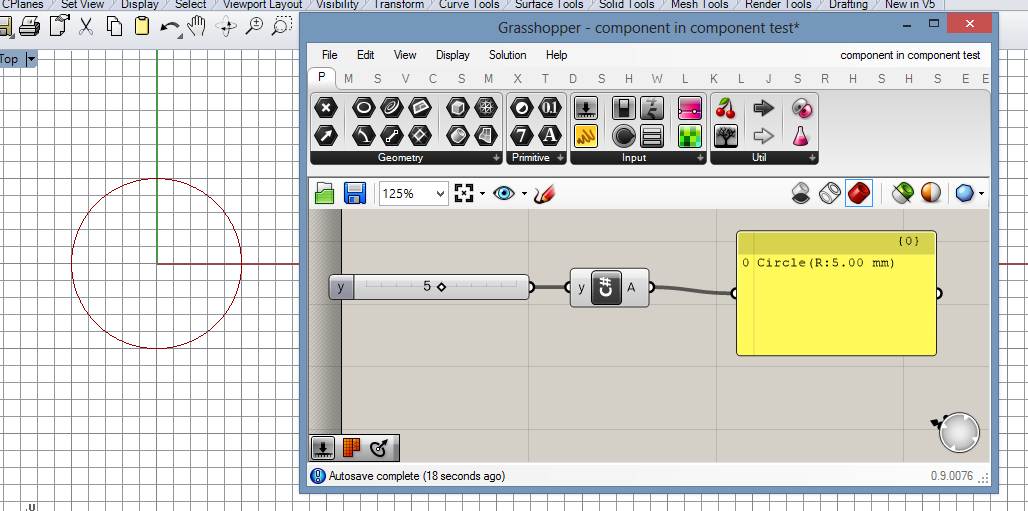
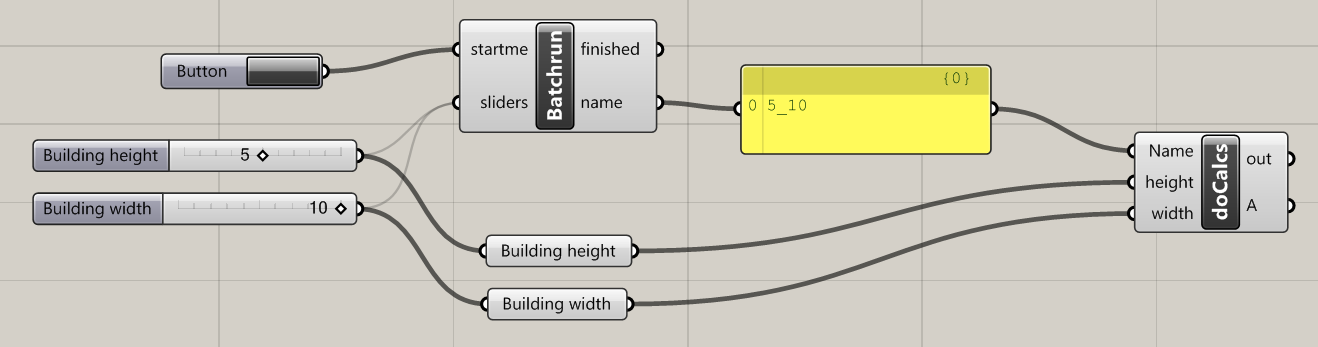
Notice that the component is initiated by a boolean button. The behaviour of the BatchRun component, explained fully here, dictates that BatchRun will then adjust the sliders. The intended action is that the sliders will then trigger the ‘building height’ and ‘building width’ params, which then will trigger the ‘doCalcs’. DoCalcs will pick up the name from the BatchRun ‘name’ output.

This normally works well. DoCalcs recognises that, when a slider has changed, both the slider values and the name have expired, and doCalcs will only function once both the sliders and the ‘name’ are up-to-date.

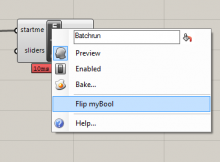
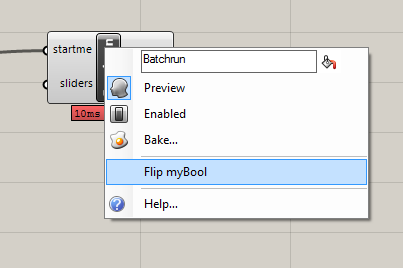
But what about, right at the beginning, when the user has pressed the button just to trigger the message box? The user may press ‘no’, in which case, we shouldn’t expect that any calculations have taken place. But watch what happens instead:

Expiration wave in Grasshopper with Batchrun component

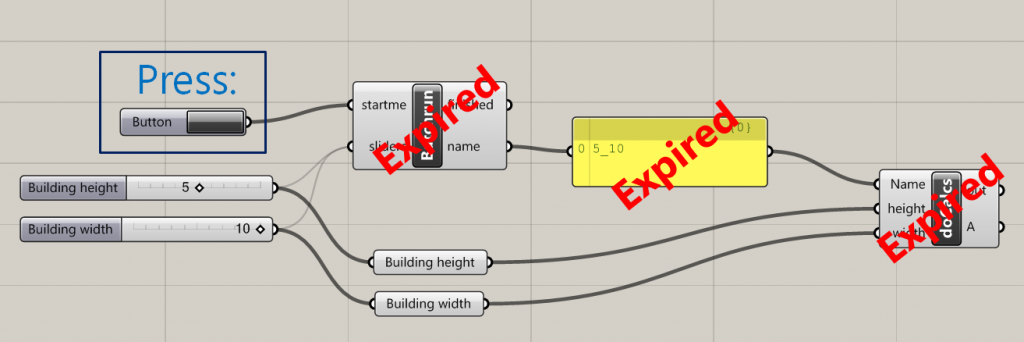
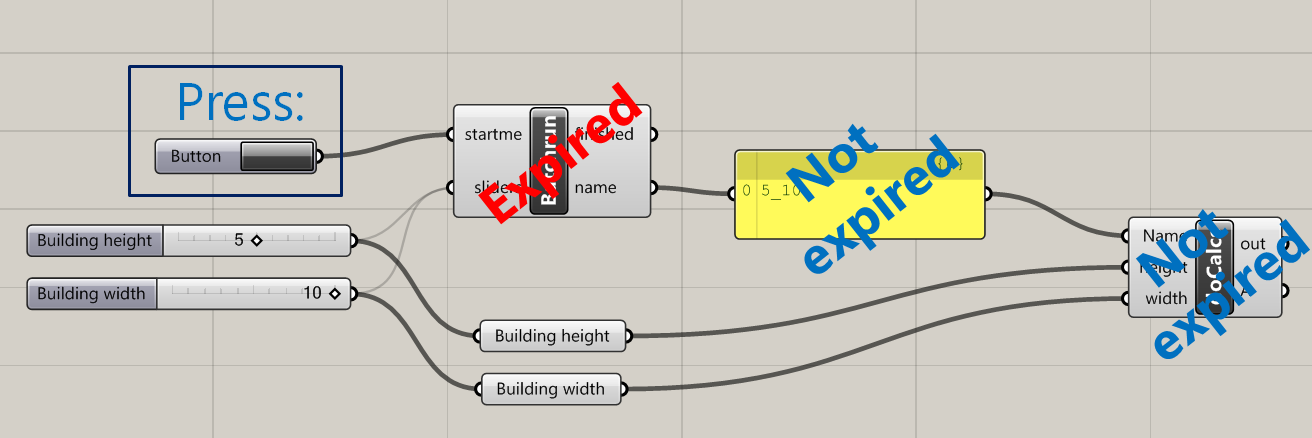
Because the button is pressed, this instantly expires the BatchRun component. This is necessary – since it’s this expiration which causes BatchRun to wake up, calculate itself, and realise it needs to show a message box.

But – BatchRun itself also has outputs. Anything connected to these outputs will then be expired. So the panel becomes expired. And, in turn, doCalcs becomes expired.

Then, once this ‘expiration wave’ has come to a stop, Grasshopper then sets itself up with doing the calculations on these expired components. As a simplified rule, it starts with the left-most components and works right.

The trouble is that, even when a component’s inputs’ data has not changed, if that component has been marked as ‘expired’, it still feels the need to recalculate itself. So, the simple act of pressing the button will compel doCalcs to recalculate – even if the user then selects ‘no’ on the messagebox that is triggered.

What’s the solution?

Ideally, we want BatchRun to be expired whenever the startme button is pressed. This is of course important – since it’s expiration which triggers BatchRun to do calculations on itself.

But, we want control on when BatchRun expires downstream objects. Can we use some logic to control whether or not BatchRun will send an expiration to downstream objects?

To try this out, I will be working on a component developed in Visual Studio. As far as I know, these techniques aren’t possible directly in the C# component in Grasshopper. You can set yourself up for developing components in VS here.

How not to expire downstream objects

My first idea was to try and find a component property called ‘Expired’ or something like it. But that failed – there’s nothing there!

Grasshopper Visual Studio expire component Intellisense

There are plenty of methods to force a component to expire and recalculate, but nothing to cancel it.

But there must be some other way of controlling the expiration wave, right?

How not to expire downstream objects, v2

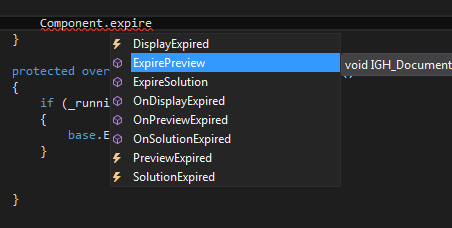
When developing Grasshopper components in Visual Studio, you have access to a wide range of override methods. Override methods control various behaviours of our component class. If we don’t implement an override, these methods work in the background and implement default behaviour. By implementing an override, we can override this default behaviour. To view which overrides are possible, simply type ‘override’ in your component class, and IntelliSense should show you a drop-down.

Grasshopper visual studio override methods in C#

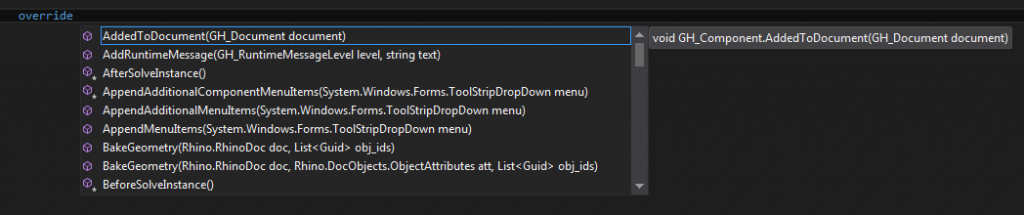
We can then select the method for which we want to change the default behaviour, for example:

Grasshopper visual studio override AddedToDocument

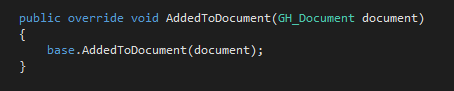
The ‘base’ part is added automatically when we select the override from IntelliSense. The ‘base’ calls the default behaviour of that method.

We can add extra code beneath or above ‘base’. This code will be called in addition to the ‘base’ code. We can also remove the ‘base’ line, which effectively removes the default behaviour alltogether.

Having a dig through the various overrides reveals one called ExpireDownStreamObjects(). Perfect – this is the one! What I can do is remove the base from this override, so Grasshopper will no longer expire downstream objects. Then, I can use the methods above to manually expire the components that I want, when I want, during the solution.

So, I simply comment out the base, and add a few lines into my SolveInstance. This extra code finds the components I want to expire at strategic times, and asks them to expire and recalculate.

            if (expire_downstream)
            {
                foreach (var receiver in Component.Params.Output[1].Recipients)
                {
                    receiver.ExpireSolution(true);
                }
            }

(Note: I have defined ‘Component’ to be the same as writing ‘this’.)

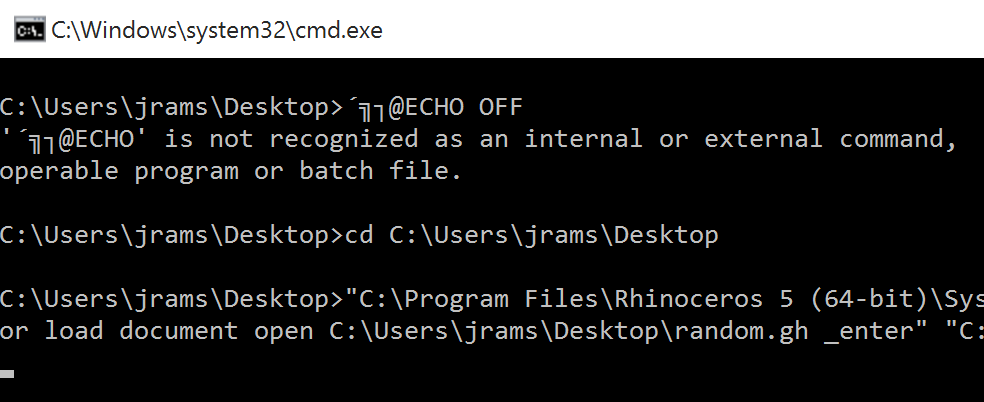
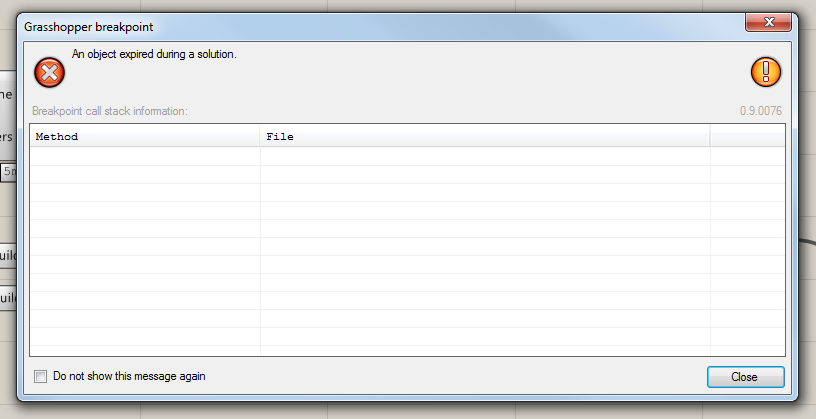
This does actually work in principle. But, for reasons I can only guess, Grasshopper prohibits expiring components during the solution, at least in certain cases. The result is an error message, below, saying that “an object expired during a solution”. This message can be cancelled, and the component will then work as designed, but this still presents a poor user experience.

Grasshopper object expired during solution error message

What you SHOULD do

The solution is to bring out the logic from the ‘solveInstance’ method. The best way to do this is to be slightly more sophisticated in our ExpireDownstreamObjects override.

One way to do this is to add a conditional to the ‘base’.

        protected override void ExpireDownStreamObjects()
        {
            if (_run || _running)
            {
                base.ExpireDownStreamObjects();
            }
        }

The above method now only allows downstream objects to be expired if the class variables _run or _running are set to true. If they’re both false, nothing will happen. Grasshopper is now much happier – no error messages, and objects are being expired as we designed them to be.

Another option is, instead of using base, we can manually expire any component we want here:

        protected override void ExpireDownStreamObjects()
        {
            if (_run || _running)
            {
                this.Params.Output[1].Recipients[0].ExpireSolution(false);
            }
        }

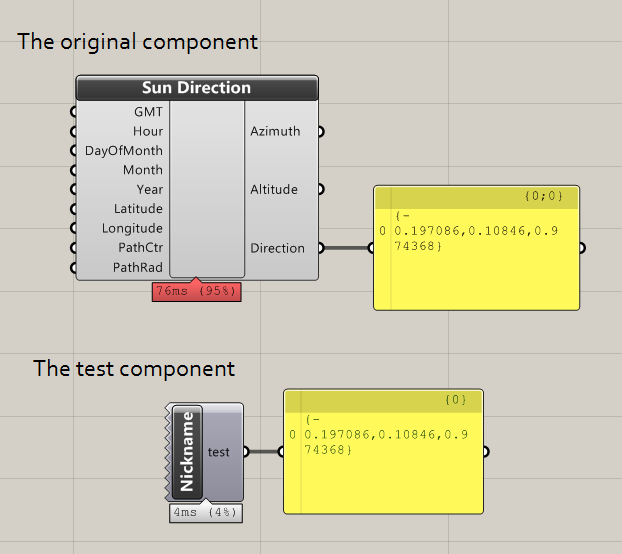
The above code will now only expire the first connected component to the second output, and only if either _run or _running are true.

Grasshopper component controlling expired status

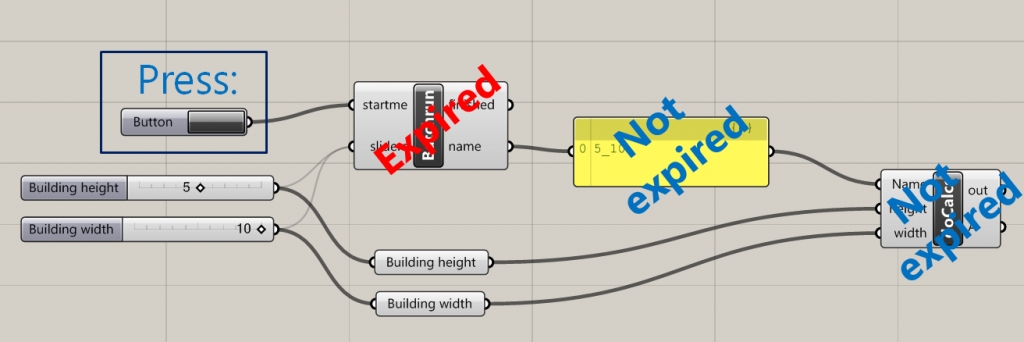
So in the image above, if BatchRun is not set to _run or _running, then pressing the button will not expire the panel. This is because the component has been repressed from transmitting an ‘expire’ command to the panel. Consequently, the doCalcs component will not recalculate – which was the intended behaviour.

You should be implementing Esc behaviour in your Grasshopper development

All Grasshopper users know the pain that comes with accidentally setting off an enormous calculation, and realising we’ve done something wrong and need to cancel it.

Since Grasshopper is tied on to the Rhino process in Windows, and the whole thing is single threaded, it is very difficult programatically to allow users to cancel a calculation part-way through. Part of the reason is that the UI and the calculations share that same thread. When heavy calculations are running, there are basically no cycles spare to handle a ‘cancel’ button.

Rutten has implemented a workaround, however. By button-mashing the Esc key during calculations, some components can listen for this key and issue an ‘abort request’. This system isn’t perfect, but it has on numerous occasions saved me from needing me to completely kill and restart Rhino.

This functionality doesn’t happen automatically. The Esc key check only happens when specified within your code, so if you never check if the Esc key is down, it is impossible for the user to abort the solution whilst Grasshopper is churning through your component. We need to implement this functionality manually.

For many lightweight components, this isn’t critical. But if your component takes a long time to calculate, it’s more likely that the user will want to abort the solution while Grasshopper is calculating yours – since Grasshopper processes each component during calculation one at a time.

How to implement Esc behaviour

Grasshopper includes some useful methods to provide the behaviour we need. How it works is that, every once in a while, we check if the escape key is down as part of our calculations. If it is down, the user wants to cancel calculations. So we submit a cancel request to Grasshopper. It is then up to Grasshopper to act upon this request.

For a compiled component, we can implement the code within SolveInstance(), or within another calculation-heavy part of your code.

The following code is in C#:

                    if (GH_Document.IsEscapeKeyDown())
                    {
                        GH_Document GHDocument = OnPingDocument();
                        GHDocument.RequestAbortSolution();
                    }

A good place to put this code is within a loop within your component. Don’t call IsEscapeKeyDown() too often though, as it requires processing power to handle this method, which will slow down your component.

Since the GH_Document is likely constant for the life of the component instance, you could pull this out and calculate it in the constructor* at the top of your SolveInstance() – since it’s a useful variable elsewhere anyway.

References

http://www.grasshopper3d.com/forum/topics/acknowledging-abort-request
And for a rather interesting comment thread… http://www.grasshopper3d.com/forum/topics/emergency-top-for-solution-calculation

Append menu items to Grasshopper components with C#

How to add items to the right-click menu in Grasshopper.

This example shows how we can add a text item to the right-click menu, and change a field within the class of our Grasshopper component.

Custom menu item in right click menu in Grasshopper

The code to do this is written for compiled C# components written in an environment such as Visual Studio. Add these methods to your component class.

        protected override void AppendAdditionalComponentMenuItems(System.Windows.Forms.ToolStripDropDown menu)
        {
            base.AppendAdditionalComponentMenuItems(menu);
            Menu_AppendItem(menu, "Flip myBool", Menu_DoClick);
        }

        private void Menu_DoClick(object sender, EventArgs e)
        {
            myBool = !myBool;
        }
        public bool myBool = false; 

This creates the menu item called ‘Flip myBool’ when we right-click the component. When we click on the menu item, it calls the Menu_DoClick method. We can define any method (with any name) that we want here.

References

http://www.grasshopper3d.com/forum/topics/set-input-parameter-from-a-pop-up-menu-vb

Run a Grasshopper component from within your C# code

How to call and calculate a Grasshopper component from within some C# code, and read and return the component outputs.

A Grasshopper component is essentially a visual interpretation of a method in programming. It has inputs, it does calculations, and it produces outputs. Grasshopper components are also saved within DLL libraries, and can be referenced. So, surely, it’s possible to access a component programatically from within something like a Visual Studio project? This is a quick first attempt to do so.

The code below attempts to read one of my own components (“CalcSunDirection”). The component runs with all inputs at default values, and then returns the first data item within output 2 (the third one in human-speak). This is copy-pasted from the Solve_Instance method when creating Grasshopper components in Visual Studio.

        protected override void SolveInstance(IGH_DataAccess DA)
        {
            //Create the component and run calculations
            var cs = new MyComponents.Components.CalcSunDirection();
            cs.CreateAttributes();
            cs.ExpireSolution(true);

            //add to document
            GH_Document GrasshopperDocument = this.OnPingDocument();
            GrasshopperDocument.AddObject(cs, false);

            //read output[2]
            cs.Params.Output[2].CollectData();
            var rtnval = cs.Params.Output[2].VolatileData.get_Branch(0)[0];

            //remove that component
            GrasshopperDocument.RemoveObject(cs.Attributes, false);

            //send output
            DA.SetData(0, rtnval);
        }

Grasshopper component for calculating sun direction written in C#, being called from a second test component

As we can see, the test component produces the same output as the CalcSunDirection component it is referencing. The above image is for comparison – in reality, the user wouldn’t see the CalcSunDirection, only the Test component.

I believe it is hypothetically possible to do this trick with any component, assuming that the DLL/GHA file containing the component you want to use is referenced in your Visual Studio project.

I tried to do this with some native Grasshopper components (such as the circle from CNR component). I looked up the namespace of the component using this tool, but I had trouble locating the DLL containing the component, so I was unable to add it to my VS project. (For example, the Circle CNR component has namespace CurveComponents.Component_CircleCNR, which is not within Grasshopper.dll. Anyone have any idea where I can find it?) Edit – found them! See below…

As a first attempt, the code above also seems inefficient in that you have to physically add the component before the outputs become readable. I get around this from a user experience point of view by removing that component after, but computationally, it still feels heavy and unnecessary.

Upon reflection, what I’ve essentially created is a programmatic version of the clustering feature of Grasshopper. Is this the best way to go about it? If you have any interesting suggestions, please let me know 🙂

Update – geometry GHA files

Many thanks to Andrew Heumann for answering my question above – many of the components are not contained within Grasshopper.dll but are saved elsewhere.

It appears that since version 0.8.0012 or so, they have been kept buried within the Program Files. On various computers, I’ve found them at:

C:\Program Files\Common Files\McNeel\Rhinoceros\5.0\Plug-ins\Grasshopper\0.9.76.0\Components

C:\Users\jrams\AppData\Roaming\McNeel\Rhinoceros\5.0\Plug-ins\Grasshopper\0.9.76.0\Components

If you are struggling to find them, and you don’t mind giving third party software direct access to your computer’s Master File Table (!), then UltraSearch is the fastest way to find the GHA files.

Within this folder is a collection of GHA files (which is essentially a DLL with the extension changed).

The full list is:

  • Curve.gha
  • Field.gha
  • Galapagos.dll
  • GalapagosLibrary.gha
  • IOLibrary.gha
  • LegacyScript.gha
  • Mathematics.gha
  • Script.gha
  • Surface.gha
  • Transform.gha
  • Triangulation.gha
  • Vector.gha

Grasshopper GHA extension files

So for the Circle CNR component, I would find it by referencing the Curve.gha file.

Update 2

See this post for updated code. This updated code allows you to create a dummy document, so you don’t need to paste components on the live document.

Convert a Brep to a Mesh in Rhino/Grasshopper C#

How to convert a Rhino Brep to a Rhino Mesh using RhinoCommon. This method is suitable for use in Grasshopper development and the Grasshopper C# component.

Create meshes from Brep

The code below produces a list of customised meshes based upon an input Brep and some mesh settings. The examples are written as static extension classes for compiled components (so you can access it directly as a Brep method), though can be easily adapted for the C# component too.

        public static List<Mesh> BrepToMeshes(this Brep brep, double maxEdge)
        {
            Mesh[] mesh;
            MeshingParameters mp = new MeshingParameters();
            mp.MaximumEdgeLength = maxEdge;
            mesh = Mesh.CreateFromBrep(brep, mp);
            return mesh.ToList<Mesh>();
        }

This method essentially replicates the Grasshopper components below:

Grasshopper component mesh to Brep

The MeshingParameters class replicates the ‘Mesh Settings’ component. You can assign settings to your mesh by creating an instance of MeshingParameters and accessing its properties, much as I have done with MaximumEdgeLength.

Joining the meshes

The output is a list of meshes. If you want to truly replicate the Mesh Brep component, you will also need to join all meshes in the list into a single mesh. This can be done with the Append method:

        public static Mesh JoinMeshes(this List<Mesh> meshes)
        {
            var rtnmesh = new Mesh();
            foreach (Mesh mesh in meshes)
            {
                rtnmesh.Append(mesh);
            }
            return rtnmesh;
        }

And for completeness, you can call the methods in a single line:

        public static Mesh BrepToMesh(this Brep brep, double maxEdge)
        {
            return JoinMeshes(BrepToMeshes(brep, maxEdge));
        }