How to access GH_Param

Today we have a special guest post from my colleague and friend Fraser Greenroyd. Fraser is the team’s resident computer scientist, and as such he is subject to the daily brunt of my programming woes. Here he recounts one of the many challenges we face in another day of beating Grasshopper into submission…

How often do you think “this won’t take more than a few minutes to figure out” and then spend far longer solving the problem? For me, that happens on an almost daily basis in my work with James, and today was no exception. Starting with a simple “before you sit down” question, James and I spent an hour traversing the inheritance of Grasshopper to solve one problem – accessing the DataMapping property of any plugged in component.

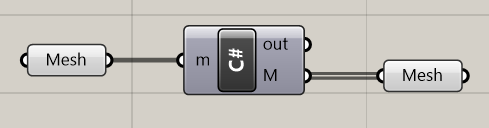
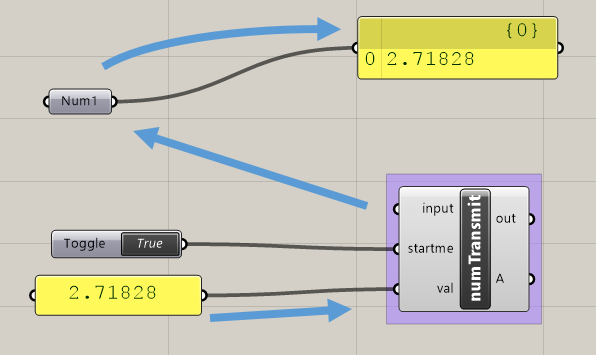
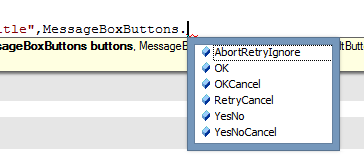
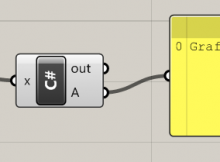
To begin with, James had created a C# component that read the component plugged into the inputs and checked if it was a ‘Num’ component. From there, he was able to output the DataMapping type, but the code doing this limited the functionality to only the ‘Num’ component. Useless for any other type.

It was recognised that, as multiple components shared similar data members, the chances of them inheriting from a single class were high, but knowing which class was, to begin with, tricky. This was compounded by the fact that I am a Computer Scientist, I’ve been programming for years and am used to reading and digesting well written SDKs but it appears the Grasshopper SDK is not well written. But never-the-less, James took me to the beginning steps and from there we began a journey up and down the inheritance tree until we stumbled upon GH_Param – a class housing such members as the Description, DataMapping and VolatileData.  Further up the tree, this inherited from the GH_DocumentObject class which meant access to this generic class should be possible from the bottom level of a component.

grasshopper-param-access-graft

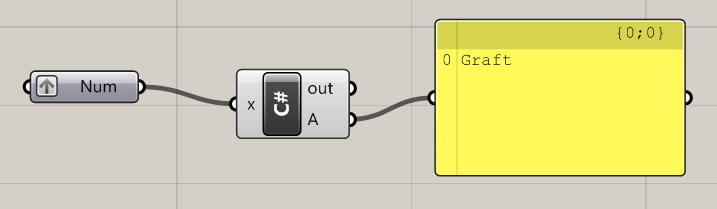
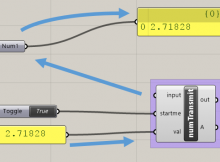
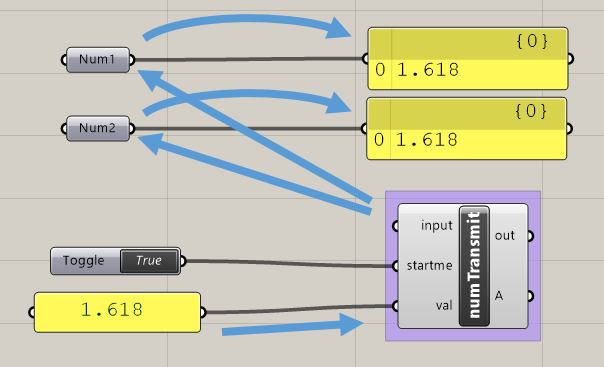
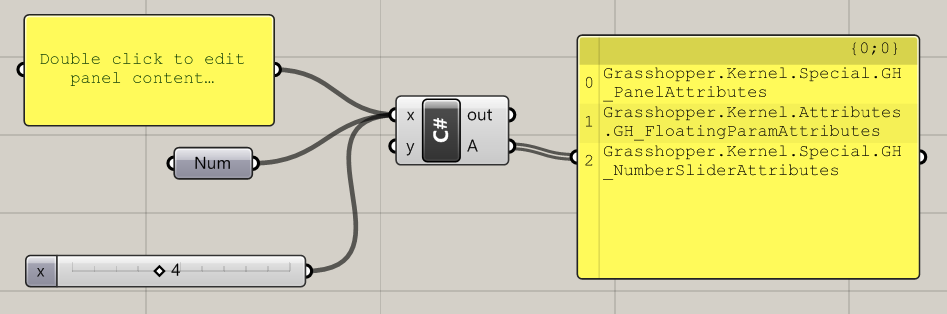
Our goal – seems simple, no?

The majority of the hour we spent on this was looking at the SDK and figuring out where we needed to be on the inheritance tree. The minority was the actual nice bit – coding. Our initial development, which was based on James’ first piece of code for the ‘Num’ component gave us a bit of a headache when the GH_Param<T> didn’t like the type we supplied. Unfortunately, the not so well written documentation did not reveal what type we needed but through some trial and error we found it to be the IGH_Goo type.

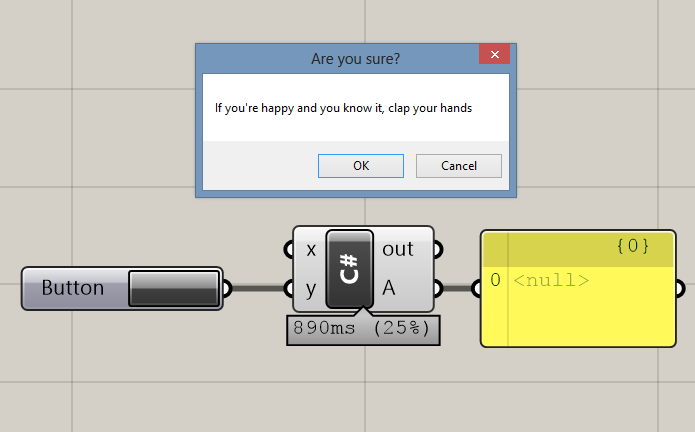
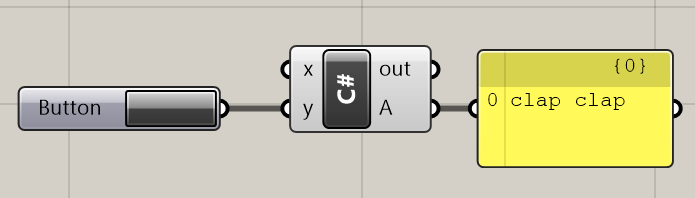
If you’re a developer, you’ll know only too well the scent of victory drawing ever closer as you change lines here and there, and the sheer frustration when it won’t compile, or doesn’t provide the output you expect. For James and I, we reached this point when the code compiled but the output wasn’t the correct DataMapping for the component plugged in. Thankfully, this did not last long as, not being a Grasshopper developer, it transpired I had forgotten to make use of the ‘sources’ of the inputs.

The final code, included in this post does not do credit to the journey we went on. From an original 30 lines of code, James was able to condense what we needed into two lines (I would have condensed it into one but that’s another story). The source code supplied here allows you to access the DataMapping variable for the first component plugged into the input side of a component, but can be easily extended using lists to include all components plugged in OR, with some clever use of the GH_DocumentObject any component on the canvas (but whether that would be useful is up for debate).

However, if you take just one thing away from this post let it be this – if you ever have to write SDK documentation, for the sanity of those using it write it properly and write it well!

Grasshopper.Kernel.IGH_Param param = Component.Params.Input[0].Sources[0];
A = param.DataMapping;

or
A = ((Grasshopper.Kernal.IGH_Param)Component.Params.Input[0].Sources[0]).DataMapping;

How to explode a mesh in Grasshopper

Exploding a mesh is a key skill in handling meshes. Knowing the different ways is a good way of demonstrating you understand how to manipulate meshes. You might need to redefine some faces in your mesh, or you might want to colour a mesh face-by-face.

What does it mean to explode a mesh? It essentially means taking each face of the mesh, and making it a separate mesh in its own right. So a single mesh with 100 faces will become 100 meshes with one face.

There are broadly three ways of exploding a mesh, depending on what you want to do, your ability level, and the wider task you are trying to achieve. Let’s say we want to explode the mesh below.

Rhino mesh grid

Starting with the easiest…

Method 1: Use MeshEdit

Use the Explode component in the MeshEdit collection of components:

Grasshopper explode mesh with MeshEdit component

Notice how we feed a single mesh into the left, and a list comes out the other end.

This method is dependent upon MeshEdit being installed on the computer that the Grasshopper file is being used on. In cases where you can’t rely on this, for example in team working or when sharing files with clients, you might want to try…

Method 2: Use native Grasshopper components

Use this slightly clunkier method which grafts mesh data to create multiple meshes. The two components are ‘Construct Mesh’ and ‘Deconstruct Mesh’. Take care of the grafts and flattens. You could always turn these into a cluster for tidiness.

Explode Grasshopper mesh with native Grasshopper components

Method 3: Use C#

If you are writing C# and want to merge the mesh explode into a script for efficiency, or you just want to show off your Grasshopper Geek credentials, you can use the following method:

  List<Mesh> Explode(Mesh m)
  {
    var rtnlist = new List<Mesh>();

    for (int f = 0; f < m.Faces.Count; f++)
    {
      var newmesh = new Mesh();
      newmesh.Vertices.Add(m.Vertices[m.Faces[f].A]);
      newmesh.Vertices.Add(m.Vertices[m.Faces[f].B]);
      newmesh.Vertices.Add(m.Vertices[m.Faces[f].C]);
      if(m.Faces[f].IsQuad) newmesh.Vertices.Add(m.Vertices[m.Faces[f].D]);

      if(m.Faces[f].IsTriangle) newmesh.Faces.AddFace(0, 1, 2);
      if(m.Faces[f].IsQuad) newmesh.Faces.AddFace(0, 1, 2, 3);

      rtnlist.Add(newmesh);
    }

    return rtnlist;
  }


…which you can easily call with:

    M = Explode(m);


This gives a nice, tidy component:

Explode mesh in Grasshopper C# component

Learning to manipulate meshes in C# is a great skill to have, and I recommend you get into it. Recently, I have used C# to turn curves into data-light meshes, and to turn curves into roads suitable for mapping.

Whichever method you’ve chosen, if you bake the result, you should end up with something like this:

Exploded Rhino grid mesh

Grasshopper without wires: Transmit data to any component

The philosophy of data in Grasshopper is quite simple: data flows from left to right, and it flows along the wires. That is, until you break it.

Based upon a slider permutation component created by David Rutten, and modified by Mostapha Roudsari, I have created a component that can transmit numbers to any component in your canvas, even when there is no wire connection.

grasshopper-transmit-data

The value is entered in the bottom left. The component then looks for any ‘Num’ components, and send the value to them. If there are multiple components, it will find them and update them accordingly.

grasshopper-transmit-data-2

By default, if nothing is connected to that ‘input’ input, the component will update all Nums. If you only want to update certain components, connect these to ‘input’.

grasshopper-transmit-data-3

The component can potentially be created to work with any component. By finding the class of any component in Grasshopper, we can interact programmatically with it.

The component is written in the C# component and can be opened and edited directly within Grasshopper.

Download


Source code

    List<System.Guid> guids = new List<System.Guid>(); //connected components

    Grasshopper.Kernel.IGH_Param selNumsInput = Component.Params.Input[0];
    IList<Grasshopper.Kernel.IGH_Param> sources = selNumsInput.Sources;
    bool isAnythingConnected = sources.Any();

    if(isAnythingConnected && (bool) startme)
    {
      foreach (var source in sources)
      {
        IGH_DocumentObject component = source.Attributes.GetTopLevel.DocObject;

        //check if valid number
        bool validNumber = true;
        Grasshopper.Kernel.Parameters.Param_Number myNum = component as Grasshopper.Kernel.Parameters.Param_Number;
        if(myNum == null) validNumber = false; //check if it's a num component
        else if(myNum.DataType == Grasshopper.Kernel.GH_ParamData.remote) validNumber = false; //check if free
        if (validNumber)
        {
          guids.Add(myNum.InstanceGuid); //a list of free num component GUIDs
        }
      }


    }

    //this loop can probably be merged with the above, unless I'm missing something...
    List<Grasshopper.Kernel.Parameters.Param_Number> nums = new List<Grasshopper.Kernel.Parameters.Param_Number>();
    foreach (IGH_DocumentObject docObject in GrasshopperDocument.Objects) //for every GH component in document
    {
      Grasshopper.Kernel.Parameters.Param_Number num = docObject as Grasshopper.Kernel.Parameters.Param_Number; //try convert to num
      if(num != null) //if that component is a num
      {
        if(isAnythingConnected) //...and nums are connected to this C# component
        {
          if(guids.Contains(num.InstanceGuid)) nums.Add(num); //...then if that num is connected, add to 'nums'
        }
        else if (num.DataType != GH_ParamData.remote)
        {
          nums.Add(num); //else add all free num components
        }

      }
    }

    //nums is the list of all the components we want to update.

    Grasshopper.Kernel.Types.GH_Number ghnum = new Grasshopper.Kernel.Types.GH_Number(val);
    foreach (Grasshopper.Kernel.Parameters.Param_Number obj in nums)
    {
      if((bool) startme)
      {
        obj.PersistentData.Clear();
        obj.PersistentData.Append(ghnum);
        obj.ExpireSolution(true);
      }
    }

    A = nums;

Add a message box to Grasshopper

A great thing about being able to use C# code in Grasshopper is the ability to access other C# libraries and functions that we wouldn’t normally think of when using Grasshopper.

The message box is a good example of this, and can be a very simple and useful way of interacting with your user.

We can add a message box with a single line of C# in the C# component.

    if(System.Windows.Forms.MessageBox.Show("If you're happy and you know it, clap your hands",
      "Are you sure?", MessageBoxButtons.OKCancel) == DialogResult.OK)
      A = "clap clap";

This gives us something like this:

grasshopper-message-box

Another nice thing about message boxes is, like in ‘regular’ C# programming, we can also get a response from the message box. If I hit ‘OK’, the output A changes:

grasshopper-message-box-2

This happens because we selected MessageBoxButtons.OKCancel. We then said that if the response is equal to DialogResult.OK then we should output ‘clap clap’ to A.

Creating our own message box

The basic structure to construct our own message box is:

System.Windows.Forms.MessageBox.Show("text","title", MessageBoxButtons.OKCancel);

We can choose a range of standard message boxes. When we create our message box, we can choose from one of 6 button combinations:

message-box-buttons

We can then respond to whatever button the user presses by writing an if statement corresponding to each of the buttons we have chosen:

message-box-buttons-2

So if we want the code to respond to the user’s choice, we will end up with something of the form:

    if(System.Windows.Forms.MessageBox.Show("text","title",MessageBoxButtons.OKCancel) 
      == DialogResult.OK)
      DoSomething();

Creating an input box

It is even possible to create an input box (i.e. a message box with a space for the user to type something), though it is slightly hacky and doesn’t look so good. It’s hacky because it’s technically not implemented for C#, and we are using the flexibility of .NET to access a library that was intended to be used with VB.

The class you need is in the VisualBasic namespace:

    if(Microsoft.VisualBasic.Interaction.InputBox("If you're happy and you know it...", 
      "What are you gonna do?", "enter response here", 100, 100) == "clap your hands")
      A = "clap clap";

…and as you’d expect, if you type “clap your hands”, we will get a response in A:

grasshopper-input-box

Thanks to this forum post for the input box code

Developing for Grasshopper in C#: Find the class for any Grasshopper component

Grasshopper components showing how the C# component can be used to access the namespace of component classes

When developing for Grasshopper, it is useful to be able to interact programatically with existing components.

The current SDK has patchy documentation and finding where and how to interact with different components can be challenging.

The script below can be used to find the namespace and class for any component. Use a default C# component. Set the first input (x) as a list, and connect your components to this.

    Grasshopper.Kernel.IGH_Param selNumsInput = Component.Params.Input[0];
    IList<Grasshopper.Kernel.IGH_Param> sources = selNumsInput.Sources;
    bool isAnythingConnected = sources.Any();
    var rtnlist = new List<object>();

    if(isAnythingConnected)
    {
      foreach (var source in sources)
      {
        IGH_DocumentObject component = source.Attributes.GetTopLevel.DocObject;
        rtnlist.Add(component.Attributes);
      }
    }
    A = rtnlist;

Once you have these namespaces, you can then dig into these components and access a wide range of properties. It’s quite fun to see what you can do with them.

Mesh line intersections in Grasshopper in C#

Many intersection checks are possible in C# in Grasshopper, although finding them isn’t entirely intuitive.

One task I wanted to do today was to see if a ray of light between one point and another was being blocked by a mesh. This requires a mesh-line intersection check – to check if the ray of light was being blocked by the mesh.

How to calculate an intersection

You can find a lot of intersection methods for different kinds of geometry under Rhino.Geometry.Intersection. The mesh line intersection is a good choice as it is one of the faster intersection checks – especially compared to anything involving surfaces.

To do the intersection check, we need our mesh and our ray. The ray can be a bit challenging to set up – it’s a common mistake to forget to realise that your line start and end points might be touching the mesh, which would lead to positive intersection results. This is why I’ve redefined my line to run from 0.001 to 0.999.

        //collision test
        var ln = new Line(e[em], centre); //ray
        var startpt = new Point3d(ln.PointAt(0.001)); //modify ray so start/end don't intersect
        var endpt = new Point3d(ln.PointAt(0.999));
        ln.From = startpt;
        ln.To = endpt;
        Int32[] intersections; //where intersection locations are held
        Rhino.Geometry.Intersect.Intersection.MeshLine(r, ln, out intersections);

        //calculate emission contribution and add to that receiver
        if(intersections == null)
        {
          //if no intersections, we can assume ray is unimpeded and do our calcs
          double contribution = Math.Cos(alpha) / (dist * dist);
          rtnvals[f] += Math.Max(contribution, 0);
        }

Area of a mesh face in C# in Grasshopper

Another quick script for handing meshes – this time to find the area of a mesh face.

This script is in C# and can be easily used with the C# component in Grasshopper. Copy the script into the ‘custom additional code’ section. It is written as a method, so you can easily call it. In the ‘RunScript’ section, call the method with something like:

double area = Area(3, myMesh)

This will return the area of the third face in the mesh called myMesh.

The method itself to calculate the area of a mesh face is below. Of course, you can use this method in any C# application, not just Grasshopper – you’ll just need to modify the code to fit whatever data structure your mesh uses.

  double Area(int meshfaceindex, Mesh m)
  {
    //get points into a nice, concise format
    Point3d[] pts = new Point3d[4];
    pts[0] = m.Vertices[m.Faces[meshfaceindex].A];
    pts[1] = m.Vertices[m.Faces[meshfaceindex].B];
    pts[2] = m.Vertices[m.Faces[meshfaceindex].C];
    if(m.Faces[meshfaceindex].IsQuad) pts[3] = m.Vertices[m.Faces[meshfaceindex].D];

    //calculate areas of triangles
    double a = pts[0].DistanceTo(pts[1]);
    double b = pts[1].DistanceTo(pts[2]);
    double c = pts[2].DistanceTo(pts[0]);
    double p = 0.5 * (a + b + c);
    double area1 = Math.Sqrt(p * (p - a) * (p - b) * (p - c));

    //if quad, calc area of second triangle
    double area2 = 0;
    if(m.Faces[meshfaceindex].IsQuad)
    {
      a = pts[0].DistanceTo(pts[2]);
      b = pts[2].DistanceTo(pts[3]);
      c = pts[3].DistanceTo(pts[0]);
      p = 0.5 * (a + b + c);
      area2 = Math.Sqrt(p * (p - a) * (p - b) * (p - c));
    }

    return area1 + area2;
  }

This script is based upon Heron’s Formula, which calculates the area of a triangle based upon knowing its three lengths. The script also calculates the area for quads. It does this by dividing the quad into two triangles.

mesh-area

C# code for getting the centrepoint of a mesh face in Grasshopper

A method I quickly wrote to get the centrepoint of a mesh face using the C# component in Grasshopper. More information about the mesh data structure used to generate this code is in this post.

The method essentially calculates the ‘average’ location of each of the 3 or 4 nodes on the mesh. (Formally, this is a simplification of the first moment of area.)

  Point3d CentrePoint(int meshfaceindex, Mesh m)
  {
    var temppt = new Point3d(0, 0, 0);

    temppt.X += m.Vertices[m.Faces[meshfaceindex].A].X;
    temppt.Y += m.Vertices[m.Faces[meshfaceindex].A].Y;
    temppt.Z += m.Vertices[m.Faces[meshfaceindex].A].Z;

    temppt.X += m.Vertices[m.Faces[meshfaceindex].B].X;
    temppt.Y += m.Vertices[m.Faces[meshfaceindex].B].Y;
    temppt.Z += m.Vertices[m.Faces[meshfaceindex].B].Z;

    temppt.X += m.Vertices[m.Faces[meshfaceindex].C].X;
    temppt.Y += m.Vertices[m.Faces[meshfaceindex].C].Y;
    temppt.Z += m.Vertices[m.Faces[meshfaceindex].C].Z;

    if(m.Faces[meshfaceindex].IsQuad)
    {
      temppt.X += m.Vertices[m.Faces[meshfaceindex].D].X;
      temppt.Y += m.Vertices[m.Faces[meshfaceindex].D].Y;
      temppt.Z += m.Vertices[m.Faces[meshfaceindex].D].Z;

      temppt.X /= 4;
      temppt.Y /= 4;
      temppt.Z /= 4;
    }
    else
    {
      temppt.X /= 3;
      temppt.Y /= 3;
      temppt.Z /= 3;
    }

    return temppt;
  }

It’s sloppy to have the code so repetitive, but the .A and the .X notation don’t make for good code efficiency. It’s sometimes possible to use temppt[d] where d = 0, 1 or 2 for X, Y and Z correspondingly (which would allow the use of a ‘for’ loop), but the mesh Vertices property returns Point3f instead of Point3d, which doesn’t allow this.

How to colour a mesh using the C# component in Grasshopper

In this post, we saw how you can apply colours to a mesh using Grasshopper components.

Sometimes we would rather use C# code – in certain cases it can be a lot faster than clicking around the Grasshopper canvas, and it can give us a lot more control. How can we apply colour to a mesh using C#?

How coloured meshes work in Grasshopper

If we understand the mesh structure in Grasshopper, we know that meshes are defined by nodes and faces. We create a list of nodes, and then ‘join them up’ into faces of 3 or 4 nodes.

When we colour a mesh in Grasshopper, we do not colour the faces themselves. Instead, we set each node to a colour. So, if we have a simple mesh of one face and four nodes, we must define four colours, one for each node.

We can set the same colour to every node to get a uniform colour. But a nice thing that we can do is set different colours to each node. Rhino will automatically render the mesh with smooth colour gradients – nice!

As an aside, if you want one uniform colour per face, as in the second example here, we must again explode the mesh into multiple meshes, one per face. Alternatively, instead of exploding, you could duplicate the nodes at points where faces of different colours meet.

An example

Let’s say you want to create a mesh with a 3-colour gradient of red, yellow and green, as below:

Grasshopper mesh 3 colour gradient

We can create this with a mesh of 2 faces and 6 nodes. Create a C# component within Grasshopper with default input/outputs, and copy the code below:

    //declare an empty mesh
    var mesh = new Mesh();

    //create vertices
    mesh.Vertices.Add(0, 0, 0);
    mesh.Vertices.Add(5, 0, 0);
    mesh.Vertices.Add(5, 2, 0);
    mesh.Vertices.Add(0, 2, 0);
    mesh.Vertices.Add(10, 0, 0);
    mesh.Vertices.Add(10, 2, 0);

    //create colour list. The vertex [i] is coloured by the value at VertexColors[i]
    //the VertexColors list MUST be the same length as the vertices list
    mesh.VertexColors.Add(Color.Red);
    mesh.VertexColors.Add(Color.Yellow);
    mesh.VertexColors.Add(Color.Yellow);
    mesh.VertexColors.Add(Color.Red);
    mesh.VertexColors.Add(Color.Green);
    mesh.VertexColors.Add(Color.Green);

    //create faces using vertex indices
    mesh.Faces.AddFace(0, 1, 2, 3);
    mesh.Faces.AddFace(1, 4, 5, 2);

    //return mesh
    A = mesh;

A few notes

The colours are saved as a list in VertexColors. Note that this list must either be completely empty (if you are not interested in colouring your mesh) or it should be exactly the same length as the Vertices list. Fail to do this, and your mesh will have a nasty habit of disappearing with no word of warning!

Since VertexColors is a list, once you have added colours, you can edit them in the usual way with VertexColors[i] where i is some index number. But, like a list, you cannot add a new colour using VertexColors[i] – you must use the VertexColors.Add() method.

Colours are normally defined using RGB values, for example:

Mesh.VertexColors.Add(255,0,0);

But a useful shortcut if you don’t know/can’t be bothered to look up colour codes is to use shortcuts like Color.Red instead of RGB values.

FastMesh for Grasshopper: A cluster to make fast, light meshes from curves

Creating a mesh from a curve can be challenging in Grasshopper. Most ways of doing it involve creating a surface and then meshing that surface. And once the mesh is made, it often has inconsistent face densities, with unusual points of high point density.

bad_mesh

The mathematics behind these methds are fine for the general case (any closed curve in any alignment), but in cases where we have a planar polyline (i.e. no curved segments, such as a room or building outline) and where this curve lies in the XY plane, we can use a highly optimised algorithm.

FastMesh is my attempt. Simply connect a polyline (or list of polylines) and it will mesh those curves – without the heavy operation of creating intermediary surfaces. I have attempted to ensure that points are distributed evenly in a grid-like pattern (so it is suitable for creating analysis meshes for tools like Honeybee), and you can optionally control the distance between points by inputting a distance into ‘s’. If you leave ‘s’ blank (or set it to 0) it will create a mesh with a minimum number of faces, creating extremely light meshes, for example in creating buildings with Elk.

good_mesh

The principle of my method is that it generates a collection of mesh points, and removes any mesh points that don’t lie inside the curve. It then performs a Delaunay Triangulation on remaining points. For concave shapes, triangles will be formed that fall outside the curve, which are removed.