If you have a website using webhost such as SiteGround, you are probably using the cPanel software to manage it. Many hosting packages allow multiple domains to be hosted. This short guide shows how to set up a second and a third domain on your hosting service through cPanel, and how to set up a WordPress installation on it.
I have such a package with SiteGround, and of course I am running james-ramsden.com on it. After a recent trip to Japan, I am wanting to create a new website called ski-hokkaido.com to document the trip (though we’ll see if that actually happens!), and to save costs I am going to run it from the same SiteGround hosting account. It’s been a while since I’ve done something like this, and it was a bit of a headache when I couldn’t remember how to do it, so hopefully this guide will jog both my memory if I need to do it again, as well as hopefully being useful for anyone else…?
This process is free of charge. It takes about 10 minutes of your time, though it will take between 2-48 hours for the servers to catch up and your new website to be live.
Step 0: What you need
- A new domain address that you want to set up
- A hosting account which uses cPanel as its management tool
In my case, I bought the domain from NameCheap, and I use SiteGround as my webhost.
Looking for a webhost? James-Ramsden.com is hosted by SiteGround, and I happily recommend it to others. If you are looking for a fast and good value web host, you can help support this site by signing up for SiteGround here.
Step 1: Point your domain to your webhost’s server
Your Domain Name Server (DNS) information is what turns human-readable website names (www.something.com) into a computer-readable address that helps your browser find which computer in the world it is supposed to be talking to. Your website is ‘saved’ physically on your webhost, so when a user types your web address into their browser, it needs to be able to find your webhost so that they can access your website.
Your domain is what allows this process to happen. The domain registrar essentially is the company that ‘points’ a browser towards the computer where a website is being hosted. When you have just bought a new domain, you have to make the link yourself between the domain and your website.
So how do we do this? Basically, have to find the DNS information for our webhost, and point our domain towards it.
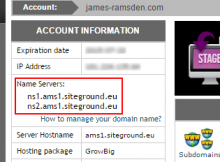
Step 1a: Go to SiteGround (or your equivalent) and log in to cPanel. Under ‘My Accounts’, look for ‘Name Servers’ in the top left.
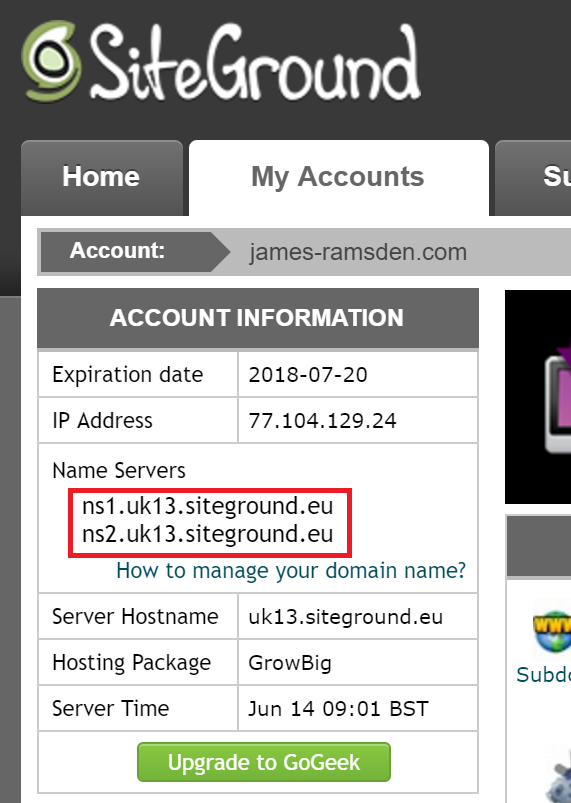
Keep this tab open.
Step 1b: We need to tell your domain registrar about the DNS addresses we found on our webhost, and the process may vary slightly depending on which company you use.
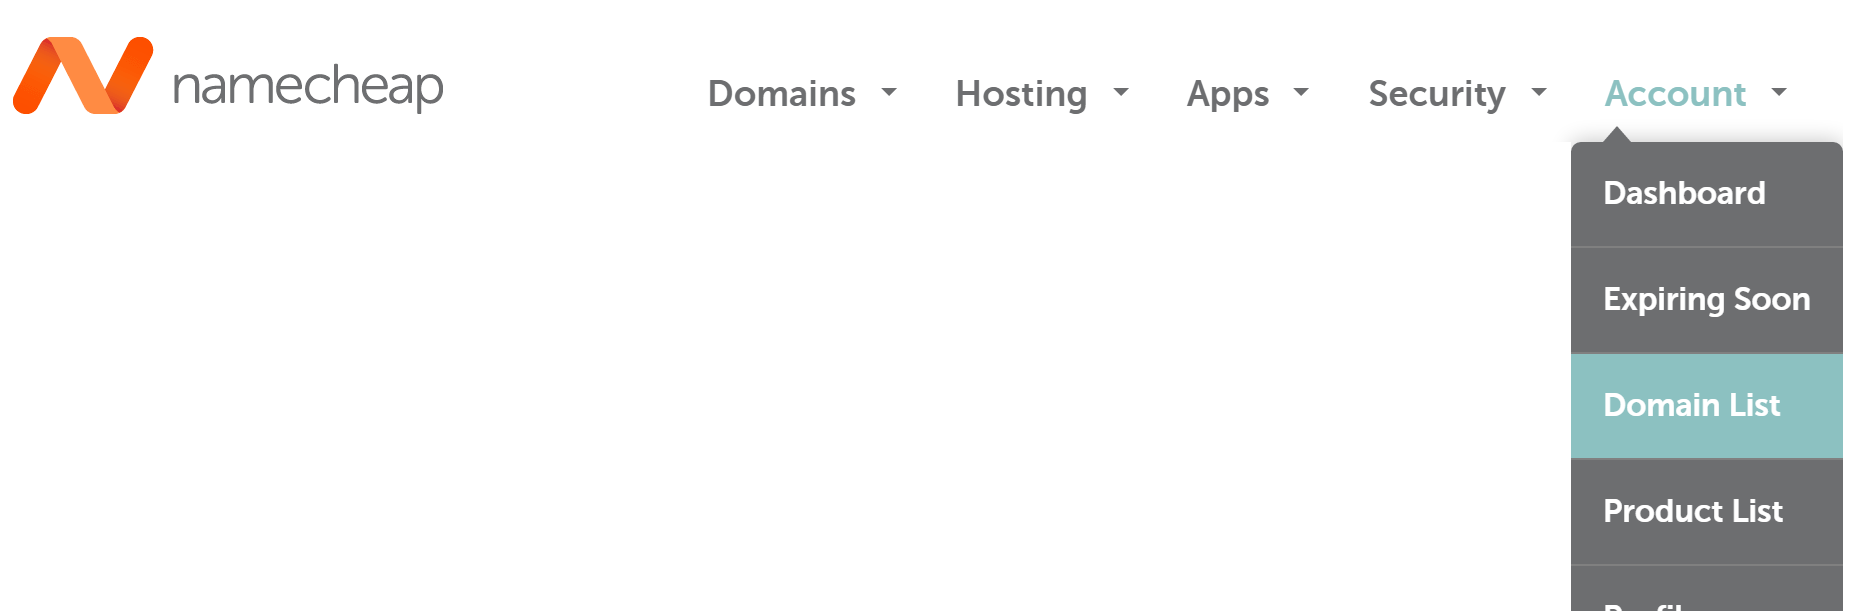
Open a new tab. Log in to Namecheap (or your own registrar) and go to ‘Domain List’.
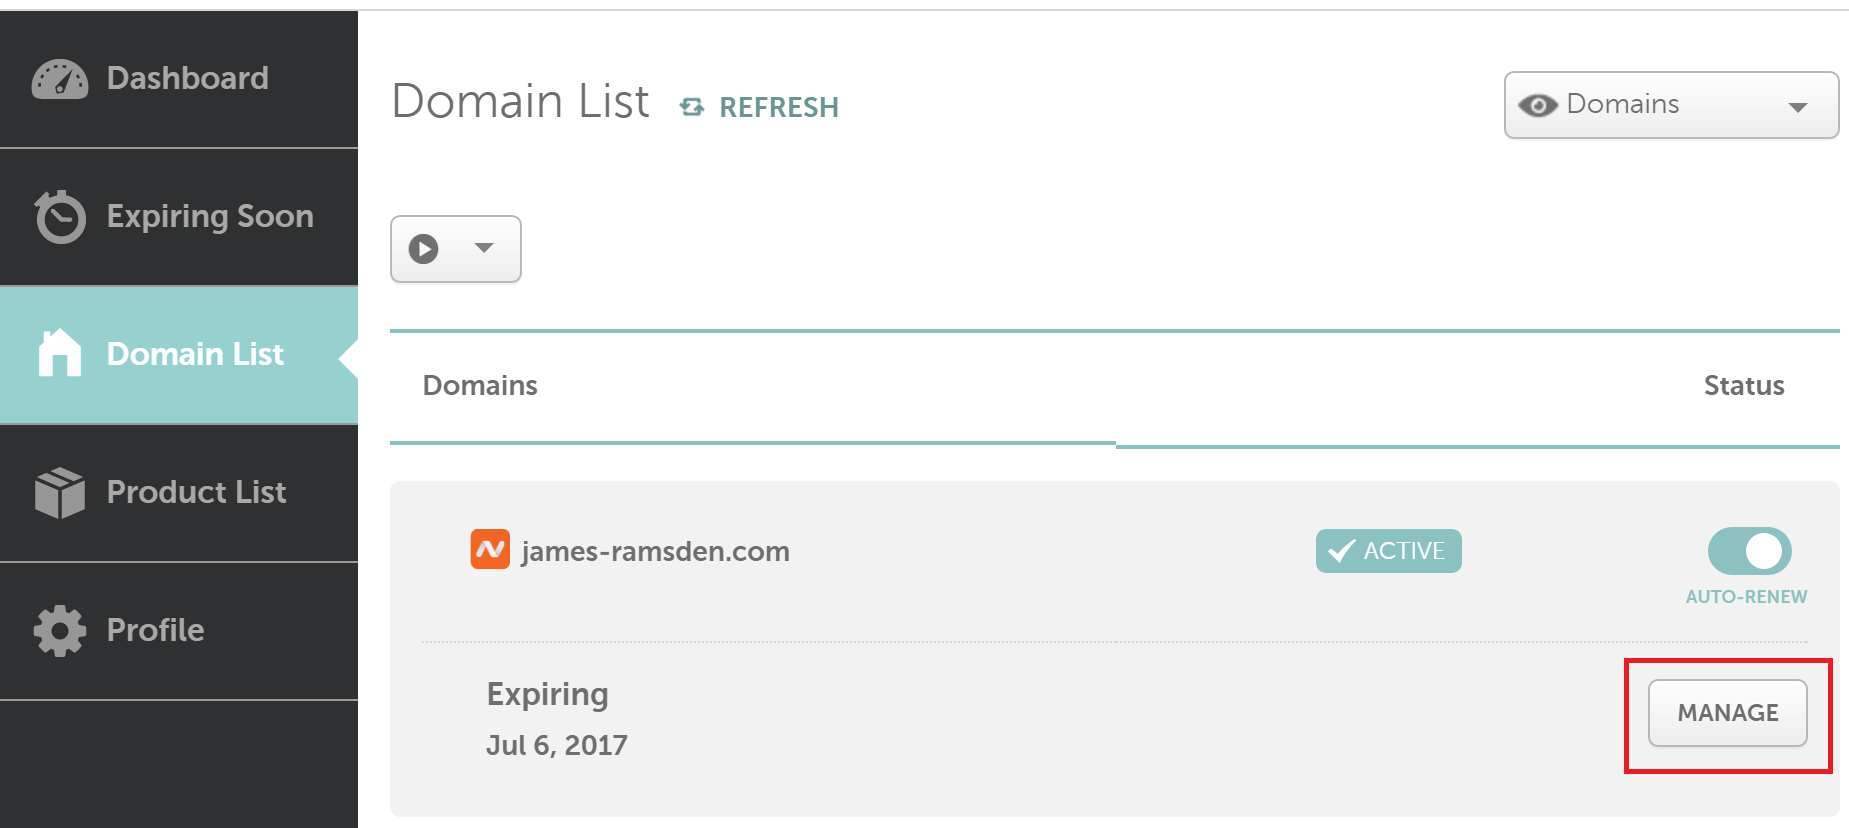
Find your website and click the ‘Manage’ button.
Scroll down to the ‘Nameservers’ section.
Select ‘Custom DNS’ and copy the DNS information that you got from SiteGround into the textboxes.
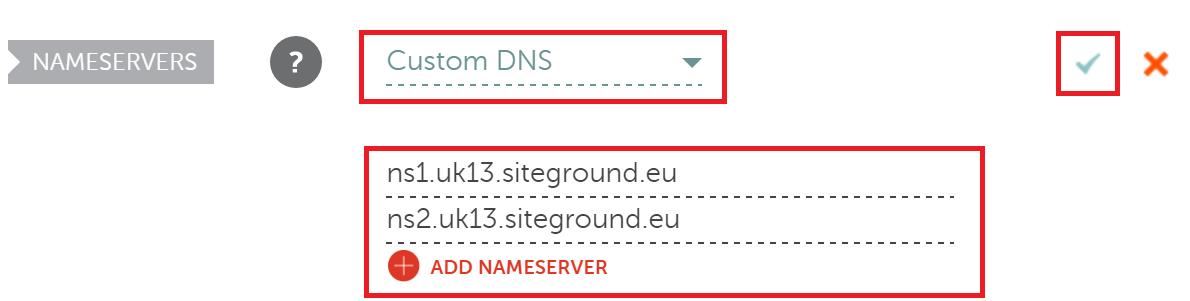
Save changes.
Step 2: Set up your domain on your webhost’s server
We have now told your domain registrar to point to your webhost when someone enters your new domain into their browser, but we haven’t told the webhost what to do when they arrive. So now we need to set up our WordPress blog, and configure it so that it loads when someone comes to our webhost with this domain.
Firstly, you need to log in to your cPanel interface. I did this by going to SiteGround, logging in, going to ‘My Accounts’ and ‘Go to cPanel’.

Once inside, find ‘Addon Domains’.

Fill in the fields below.
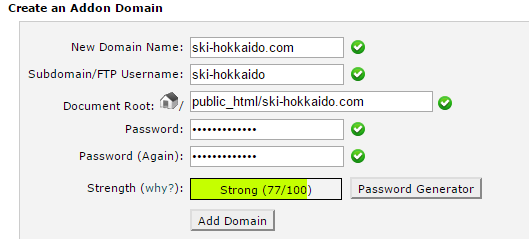
The ‘New Domain Name’ is the domain you have just bought, exactly as you registered it, but without the http part. The next two fields should autofill to sensible values, or if not then replicate the patterns in the image. Finally, enter a password.
Step 3: Set up WordPress (optional)
The above step created a folder in our server space, but there’s nothing in it. You can of course do anything with this space, but here we’re going to install WordPress.
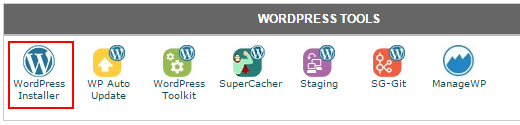
Many webhosts using cPanel make it easy to install WordPress through cPanel. Go back to your cPanel interface and find the WordPress installer.
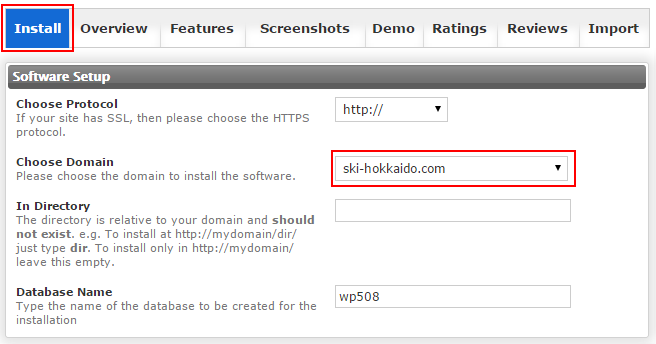
Select ‘Install’. A form will appear where we set up our WordPress blog. Find your domain in the drop-down box.
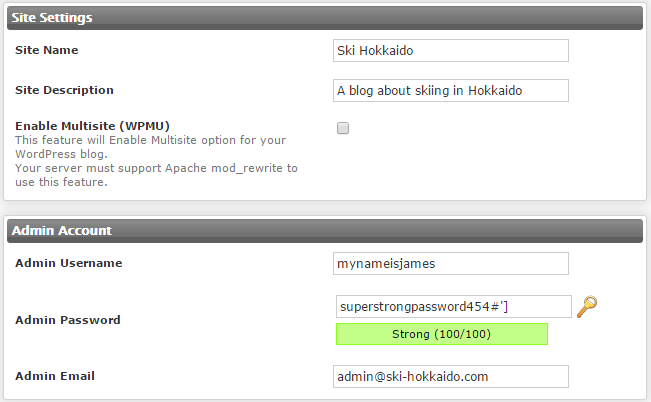
Give the site a name and a description. (You can change these later on from the WordPress dashboard.) Leave ‘multi-site’ off unless you know exactly what it is, even if you have multiple WordPress blogs. The username and the password is how you log in to the WordPress admin view, where you design your site and create content. You don’t want people hacking this, as it gives them full control of your WordPress site, so give it a secure username and password!
If you have email set up on your webhost, you can use something like has is given to you. Alternatively, you can use any email address you like. This address isn’t visible from anywhere on your site by default.
Everything else can be left as default. Click ‘install’ at the bottom, give it a few minutes, and you’re done!
So… where’s my website??
You would think now, that if we enter our address of our new website in our browser, we should see a tantalisingly empty blog, waiting to be filled. You may notice that something does load when we enter the address, but it’s a generic page filled with ‘NameCheap… website coming soon!’ with words to that effect, and no way of actually doing… anything!.
The answer is simply, relax! Transferring over domain names tends to take a while, and sometimes as long as 48 hours. With NameCheap and SiteGround, in my experience it does take a couple of hours.
And when it’s ready, you can start to edit your WordPress website in the usual way – just head to http://mydomain.com/wp-admin. Once there, enter the login details you gave when you created the WordPress installation.
Have fun!