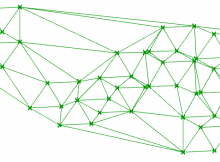
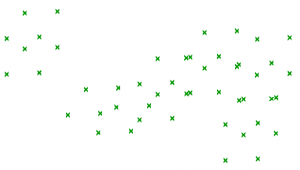
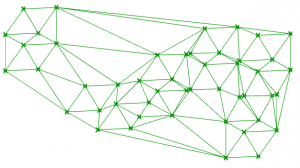
How to perform a Delaunay triangulation on a list of points mapped in 2D, using the C# component in Grasshopper.
Delaunay triangulation is a highly efficient algorithm which creates a triangulated mesh from a collection of points. This page shows how to create a 2D mesh from a collection of points on the XY plane.
Input
A list of Point3d. These points should already be mapped onto a 2D plane – ideally onto the XY plane.
If your points aren’t mapped onto a 2D plane, you’ll need to do this in advance. The reason for this is that the Delaunay triangulation algorithm below uses the Node2 type – essentially like a point, but only with X and Y coordinates – since this algorithm produces a 2D mesh.
Output
A regular, Grasshopper-friendly mesh.
Steps
- Convert Point3d into Node2
- Add Node2 to Node2List (that’s a list of Node2s, not “node-to-list”!)
- Calculate connectivity of mesh faces
- Construct and return mesh
C# code
The code below uses Grasshopper.dll to perform the Delaunay triangulation.
    //input
    List<Point3d> pts;

    //convert point3d to node2
    //grasshopper requres that nodes are saved within a Node2List for Delaunay
    var nodes = new Grasshopper.Kernel.Geometry.Node2List();
    for (int i = 0; i < pts.Count; i++)
    {
      //notice how we only read in the X and Y coordinates
      //  this is why points should be mapped onto the XY plane
      nodes.Append(new Grasshopper.Kernel.Geometry.Node2(pts[i].X, pts[i].Y));
    }

    //solve Delaunay
    var delMesh = new Mesh();
    var faces = new List<Grasshopper.Kernel.Geometry.Delaunay.Face>();

    faces = Grasshopper.Kernel.Geometry.Delaunay.Solver.Solve_Faces(nodes, 1);

    //output
    delMesh = Grasshopper.Kernel.Geometry.Delaunay.Solver.Solve_Mesh(nodes, 1, ref faces);
What next?
Delaunay meshes are pretty amazing. They are quick to generate, quick to analyse and quick to render. They generate sensible triangulation and require no more information than the input points. Unless you absolutely must have smooth surfaces and edges, don’t use a surface, use a mesh.
This video uses Delaunay triangulation to power the graph in the bottom left. The graph was easily coloured by associating each node in the mesh with a value.
These posts will help you get started in making the most of your mesh:
- Understand the mesh data structure, and how to manipulate it
- Colour a mesh in Grasshopper
- Colour a mesh using C#


