How to automatically get the measurement units in Grasshopper/Rhino

How to automatically find out if your Rhino document is set to millimetres or metres:

private void RunScript(ref object scale)
  {
    int rtnval = 1;
    Rhino.RhinoDoc  doc = Rhino.RhinoDoc.ActiveDoc;
    Rhino.UnitSystem  system = doc.ModelUnitSystem;
    if(system.ToString() == "Meters") rtnval = 1;
    else rtnval = 1000;
    scale = rtnval;
  }

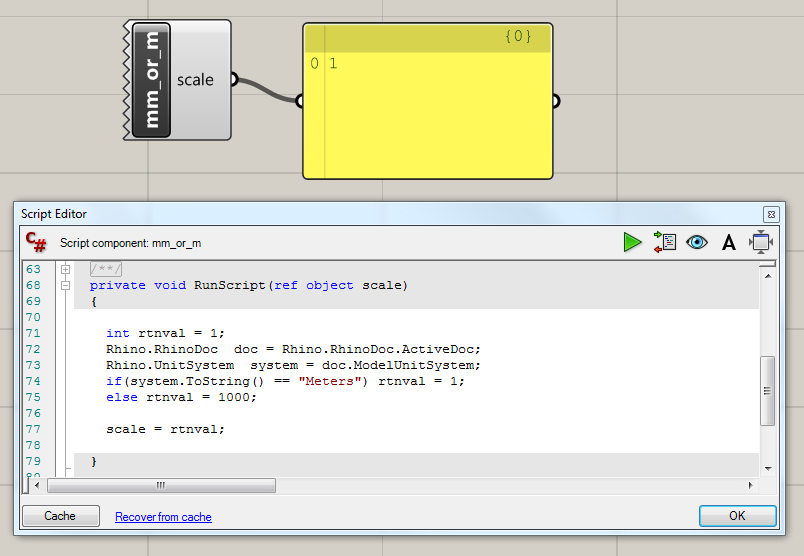
This script returns a value of 1 if the document is in metres, or 1000 otherwise. (I assume that the user will only be using mm or m.)

To use, create a C# component in Grasshopper and copy the part between the curly brackets to the code of the C# component. Make sure that the component has an output called ‘scale’.

mm or m component

…or download the component from below:

Download

How to colour a mesh in Grasshopper

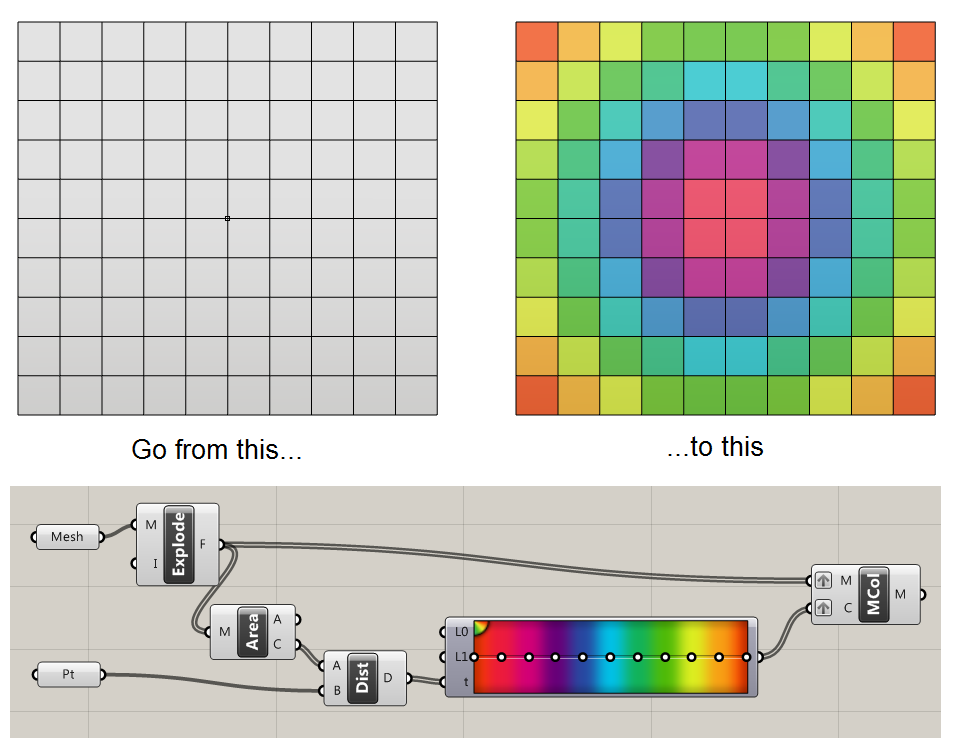
Let’s say that you have a mesh and a point. You want to colour the mesh according to how far the different parts of the mesh are from the point.

To do this, we need to:

  1. Import the mesh and the point into Grasshopper
  2. Calculate the distance between the different points on the mesh
  3. Apply these colours to the mesh

Colour a mesh with smooth gradients

Colour a mesh in Grasshopper - smooth


Colour a mesh with one colour per face

Colour a mesh in Grasshopper - discrete

Note that here I am using the ‘Mesh Explode’ component to break a mesh into its faces, which is part of the MeshEdit plugin for Grasshopper.

I also have grafted both inputs to ‘Mesh Colour’ – don’t forget to do this! You should quickly see why if you don’t…

If you don’t want to use MeshEdit, you can recreate the behaviour using the slightly more clunky method below:

Colour a mesh with one colour per face - Grasshopper

Finally, if you are writing script, it is also possible to colour a mesh using the C# component. See this post for more information.

Creating a relaxed grid on a mesh dome roof with Rhino/Grasshopper and SmartForm

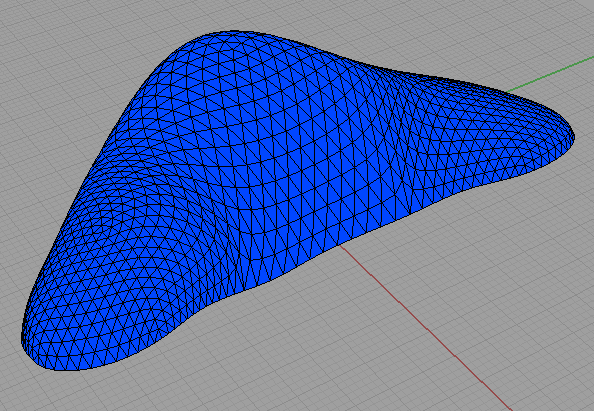
Something I’ve found in my archives – one of the first projects I did when starting my EngD in 2013. We had received a domed roof from the architect, and we had been asked to optimise the form and experiment with different gridding options.

The problem was that the model we received was nothing more than a collection of lines arranged into one grid pattern and lots of little mesh faces between these lines – no NURBS surfaces or anything else nice to work with! The challenge was therefore threefold: recreate the NURBS surface, manipulate the surface into a structurally more efficient form (think lots of non-zero Gaussian curvature) and then apply a range of grids to it.

In hindsight, the methodology presented below certainly isn’t the most efficient or effective, but the important thing (as is usually the case in engineering) is that it got the job done!

Continue reading Creating a relaxed grid on a mesh dome roof with Rhino/Grasshopper and SmartForm

How to install Honeybee for Grasshopper

Honeybee is a plugin for Grasshopper for daylight analysis, created by Mostapha Sadeghipour Roudsari. Honeybee links to third party analysis tools in order to do its calculations. So in order to install Honeybee, we also need to install these tools. This can be a little fiddly – this guide shows how I got round it. Continue reading How to install Honeybee for Grasshopper

How to read Excel files with Grasshopper

A quick guide to reading Excel files into Grasshopper for Rhino.

1) Install the LunchBox plugin for Grasshopper

2) Open the Excel file you want to read, and minimise it to the taskbar.

3) In Grasshopper, find the component called Excel Reader. Add your worksheet, column and row values in numerical format. Set ‘read’ to true.

Hints and tips

  • The component is clever – you don’t need to ‘link’ the Excel file to GH – it just looks for anything you have open. This is apparently more computationally efficient.
  • If you want to read multiple columns at once, enter multiple columns using the ‘series’ component. The output is a data tree instead of a list.

  • Always use numbers to describe columns (A=1, B=2…) and worksheets (Sheet1 = 1, Sheet2 = 2…).

How to install Ladybug for Grasshopper

Ladybug is a free plugin for Grasshopper that uses the EnergyPlus engine to provide a range of environmental calculations and visuals for input geometry. This guide will show you how to install Ladybug.

If you are looking to install the more recent Ladybug + Honeybee components for Grasshopper, this guide will help you too.

Check you have the right software

Firstly, you need Rhino 5. Rhino 4 won’t do! You can download a free trial here.

You also need Grasshopper, a free plugin for Rhino. Download the latest version here.

Then you need GHPython. Download it, and unzip it. In GH, open your components folder:

grasshopper special folders drop down menu

This should open a folder in a location like C:\Users\jramsden\AppData\Roaming\Grasshopper\Libraries. Paste GHPython.gha into this folder.

Install Ladybug

Visit the Ladybug page, take a read of it and have a look at the video. Then download the unlocked version from the page (or quicklink here). This should download a zip folder. Unzip this folder (the next step won’t work if you don’t unzip it first!).

Within the folder should be about 28 .ghuser files. Select them all and drag them directly into the GH window.

ladybug for grasshopper install components

Done! To double-check, go to your GH User Object folder under the Special Folders as above (e.g. C:UsersjramsdenAppDataRoamingGrasshopperUserObjects). The .ghuser folders should be in here.

Now a new tab should have appeared in your GH window called Ladybug.

ladybug ribbon icons grasshopper

There are 5 categories of components, labelled 0-4. In using Ladybug, these are run through roughly in order.

Setting up Visual Studio Express 2012 and 2013 to write your own Grasshopper components in C#

A quick guide for setting up Visual Studio Express for developing Grasshopper components for Rhino 5. Continue reading Setting up Visual Studio Express 2012 and 2013 to write your own Grasshopper components in C#

Data trees and C# in Grasshopper

Understanding how Grasshopper handles data is crucial for taking full advantage of GH’s capabilities. For collections of data, they can either be in the form of lists or trees.

A list is a collection of items of data, in a particular order, but with no hierarchical structure. Here is a list of numbers:
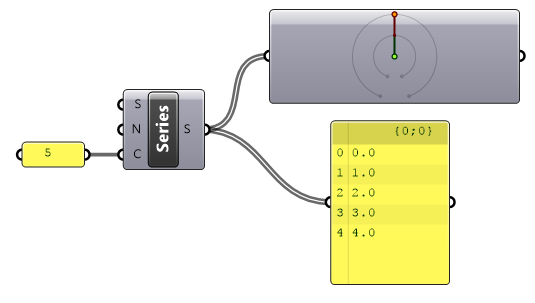
Grasshopper list of numbers with series component

The component in the top-right is the param viewer. Double click it to see this:
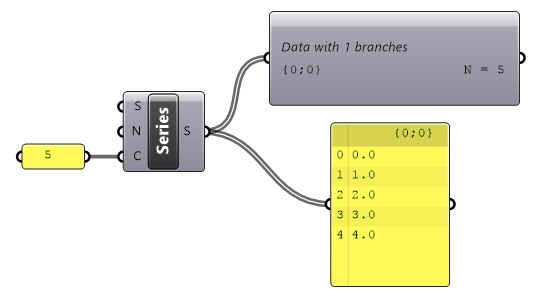
Grasshopper series list with param viewer

The ‘N’ denotes a list with N items. A list can be thought of as a tree with a single branch {0}. So here, we are looking at a single list, with address {0}, containing 5 items.

A tree is any data structure in GH with multiple branches. In other words, it’s a data structure with multiple lists. Each list has its own address.

Now, let’s make a grid of points. We can do this with our list of numbers and the ‘construct point’ component.
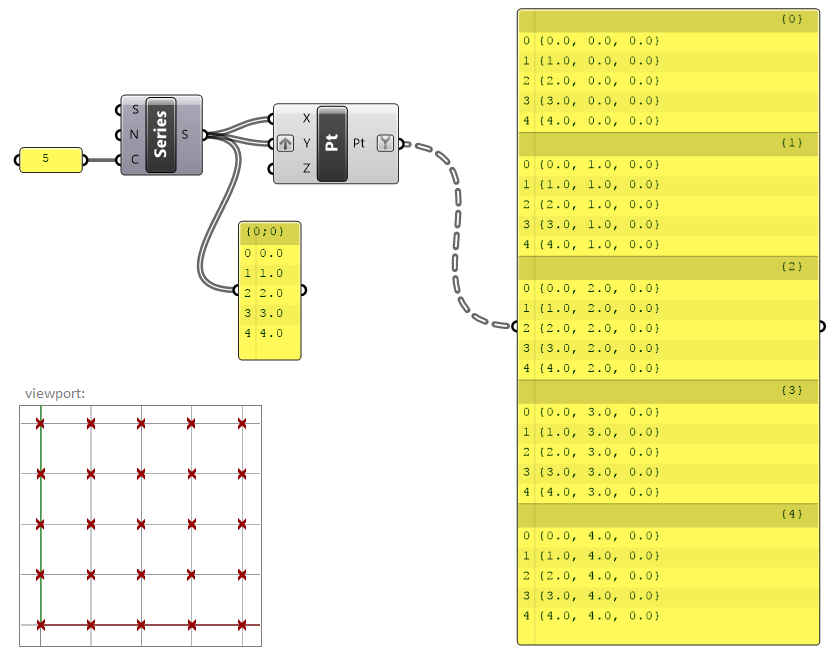
Grasshopper construct grid of points

Here, we have cleverly grafted the Y input to coerce Grasshopper into giving us 25 points for our list of 5 numbers. But the output looks a little different. Instead of a list of 25 points, we have 5 groups of 5 points each.

What’s happened here is that Grasshopper has created 5 branches. Each branch contains a list of 5 points. Each branch has its own address {0} to {4}, shown in the panel.

We can verify this using the param viewer.
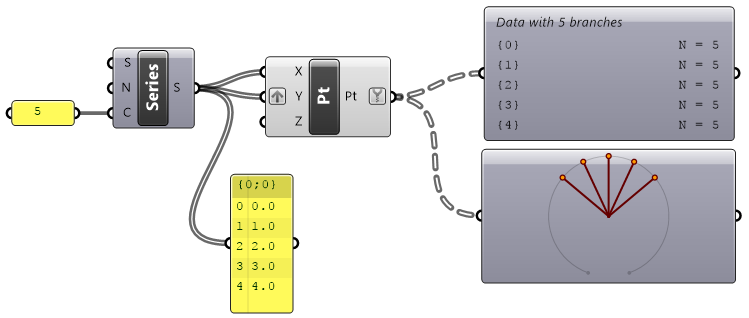
Grasshopper param viewer for trees

Trees in C#

Trees can be created and manipulated in C# components too. When we add data to a tree in C#, we need two pieces of information:

  • The data we are saving, such as a Point3d or an integer
  • The path we are saving to

The path is declared as a list of numbers denoting the sequence of the branches needed to access the list we are interested in. As some examples:

DataTree<Point3d> myTree = new DataTree<Point3d>();
GH_Path pth = new GH_Path(2);
myTree.Add(P, pth);

point P will be written to the list at the end of branch 2.

GH_Path pth = new GH_Path(i,j)

point P will go down branch i, then be added to the list at the end of branch j

Setting up a tree

You can either add to a tree on the fly – if you know that the data in the tree will be in the same order that you’ll be adding to it. But a more flexible way is to create a blank tree of the size you want, and then edit the values later.

Setting up a tree called boolTree (I am creating a tree based upon another tree called pts):

//declare tree
DataTree<bool> boolTree = new DataTree<bool>();
//set up tree
 for(int i = 0; i < pts.BranchCount;i++)
 {
   GH_Path pth = new GH_Path(i);
   for (int j = 0; j < pts.Branch(0).Count;j++)
   {
     boolTree.Add(false, pth);
   }
 }

This has now created a tree filled with ‘false’.

Editing values in the tree

boolTree.Branch(1,2)[5] = true;

This edits the 5th value of the list at the end of branch 1, sub-branch 2 to ‘true’.