Grasshopper without wires: Transmit data to any component

The philosophy of data in Grasshopper is quite simple: data flows from left to right, and it flows along the wires. That is, until you break it.

Based upon a slider permutation component created by David Rutten, and modified by Mostapha Roudsari, I have created a component that can transmit numbers to any component in your canvas, even when there is no wire connection.

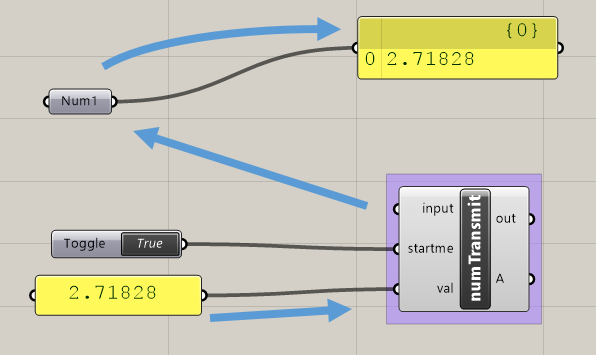
grasshopper-transmit-data

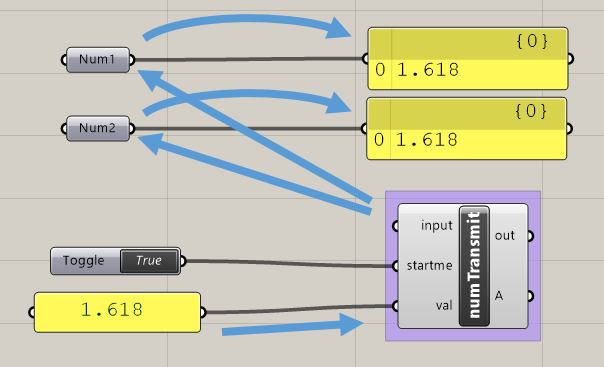
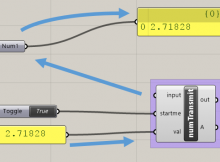
The value is entered in the bottom left. The component then looks for any ‘Num’ components, and send the value to them. If there are multiple components, it will find them and update them accordingly.

grasshopper-transmit-data-2

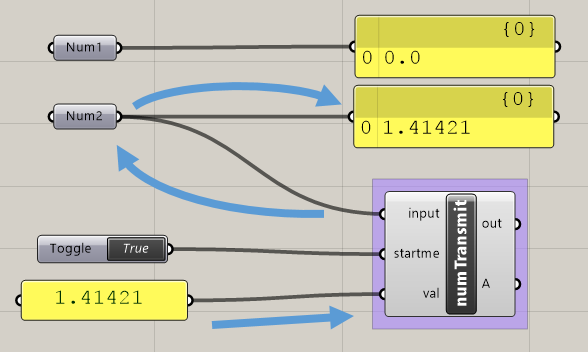
By default, if nothing is connected to that ‘input’ input, the component will update all Nums. If you only want to update certain components, connect these to ‘input’.

grasshopper-transmit-data-3

The component can potentially be created to work with any component. By finding the class of any component in Grasshopper, we can interact programmatically with it.

The component is written in the C# component and can be opened and edited directly within Grasshopper.

Download


Source code

    List<System.Guid> guids = new List<System.Guid>(); //connected components

    Grasshopper.Kernel.IGH_Param selNumsInput = Component.Params.Input[0];
    IList<Grasshopper.Kernel.IGH_Param> sources = selNumsInput.Sources;
    bool isAnythingConnected = sources.Any();

    if(isAnythingConnected && (bool) startme)
    {
      foreach (var source in sources)
      {
        IGH_DocumentObject component = source.Attributes.GetTopLevel.DocObject;

        //check if valid number
        bool validNumber = true;
        Grasshopper.Kernel.Parameters.Param_Number myNum = component as Grasshopper.Kernel.Parameters.Param_Number;
        if(myNum == null) validNumber = false; //check if it's a num component
        else if(myNum.DataType == Grasshopper.Kernel.GH_ParamData.remote) validNumber = false; //check if free
        if (validNumber)
        {
          guids.Add(myNum.InstanceGuid); //a list of free num component GUIDs
        }
      }


    }

    //this loop can probably be merged with the above, unless I'm missing something...
    List<Grasshopper.Kernel.Parameters.Param_Number> nums = new List<Grasshopper.Kernel.Parameters.Param_Number>();
    foreach (IGH_DocumentObject docObject in GrasshopperDocument.Objects) //for every GH component in document
    {
      Grasshopper.Kernel.Parameters.Param_Number num = docObject as Grasshopper.Kernel.Parameters.Param_Number; //try convert to num
      if(num != null) //if that component is a num
      {
        if(isAnythingConnected) //...and nums are connected to this C# component
        {
          if(guids.Contains(num.InstanceGuid)) nums.Add(num); //...then if that num is connected, add to 'nums'
        }
        else if (num.DataType != GH_ParamData.remote)
        {
          nums.Add(num); //else add all free num components
        }

      }
    }

    //nums is the list of all the components we want to update.

    Grasshopper.Kernel.Types.GH_Number ghnum = new Grasshopper.Kernel.Types.GH_Number(val);
    foreach (Grasshopper.Kernel.Parameters.Param_Number obj in nums)
    {
      if((bool) startme)
      {
        obj.PersistentData.Clear();
        obj.PersistentData.Append(ghnum);
        obj.ExpireSolution(true);
      }
    }

    A = nums;
Add a message box to Grasshopper

A great thing about being able to use C# code in Grasshopper is the ability to access other C# libraries and functions that we wouldn’t normally think of when using Grasshopper.

The message box is a good example of this, and can be a very simple and useful way of interacting with your user.

We can add a message box with a single line of C# in the C# component.

    if(System.Windows.Forms.MessageBox.Show("If you're happy and you know it, clap your hands",
      "Are you sure?", MessageBoxButtons.OKCancel) == DialogResult.OK)
      A = "clap clap";

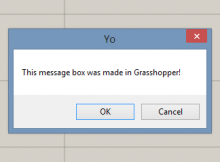
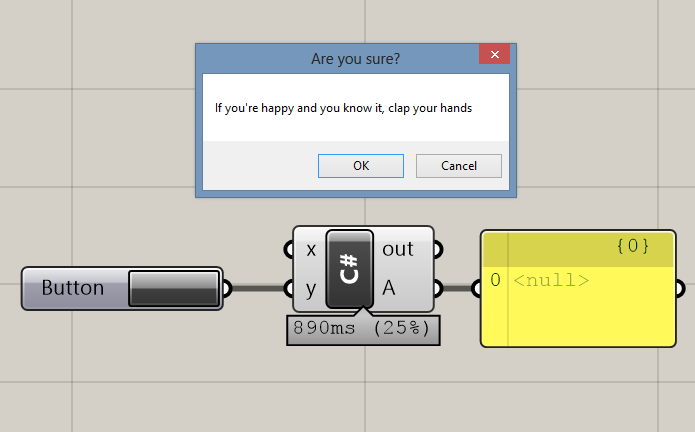
This gives us something like this:

grasshopper-message-box

Another nice thing about message boxes is, like in ‘regular’ C# programming, we can also get a response from the message box. If I hit ‘OK’, the output A changes:

grasshopper-message-box-2

This happens because we selected MessageBoxButtons.OKCancel. We then said that if the response is equal to DialogResult.OK then we should output ‘clap clap’ to A.

Creating our own message box

The basic structure to construct our own message box is:

System.Windows.Forms.MessageBox.Show("text","title", MessageBoxButtons.OKCancel);

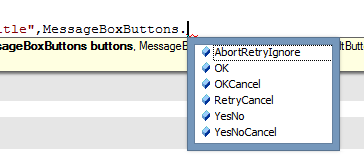
We can choose a range of standard message boxes. When we create our message box, we can choose from one of 6 button combinations:

message-box-buttons

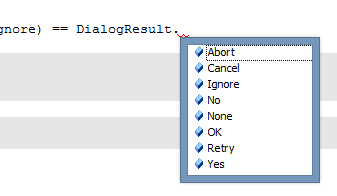
We can then respond to whatever button the user presses by writing an if statement corresponding to each of the buttons we have chosen:

message-box-buttons-2

So if we want the code to respond to the user’s choice, we will end up with something of the form:

    if(System.Windows.Forms.MessageBox.Show("text","title",MessageBoxButtons.OKCancel) 
      == DialogResult.OK)
      DoSomething();

Creating an input box

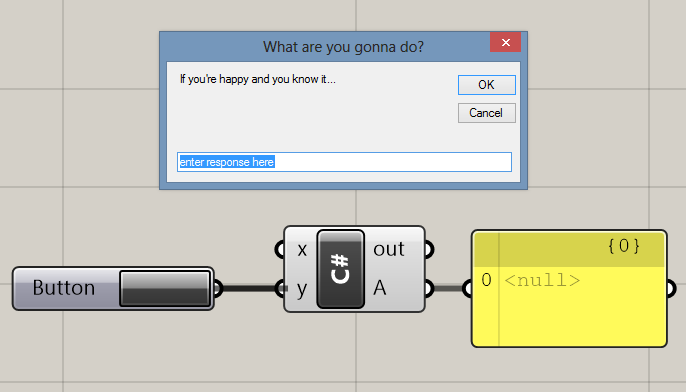
It is even possible to create an input box (i.e. a message box with a space for the user to type something), though it is slightly hacky and doesn’t look so good. It’s hacky because it’s technically not implemented for C#, and we are using the flexibility of .NET to access a library that was intended to be used with VB.

The class you need is in the VisualBasic namespace:

    if(Microsoft.VisualBasic.Interaction.InputBox("If you're happy and you know it...", 
      "What are you gonna do?", "enter response here", 100, 100) == "clap your hands")
      A = "clap clap";

…and as you’d expect, if you type “clap your hands”, we will get a response in A:

grasshopper-input-box

Thanks to this forum post for the input box code

Developing for Grasshopper in C#: Find the class for any Grasshopper component

Grasshopper components showing how the C# component can be used to access the namespace of component classes

When developing for Grasshopper, it is useful to be able to interact programatically with existing components.

The current SDK has patchy documentation and finding where and how to interact with different components can be challenging.

The script below can be used to find the namespace and class for any component. Use a default C# component. Set the first input (x) as a list, and connect your components to this.

    Grasshopper.Kernel.IGH_Param selNumsInput = Component.Params.Input[0];
    IList<Grasshopper.Kernel.IGH_Param> sources = selNumsInput.Sources;
    bool isAnythingConnected = sources.Any();
    var rtnlist = new List<object>();

    if(isAnythingConnected)
    {
      foreach (var source in sources)
      {
        IGH_DocumentObject component = source.Attributes.GetTopLevel.DocObject;
        rtnlist.Add(component.Attributes);
      }
    }
    A = rtnlist;

Once you have these namespaces, you can then dig into these components and access a wide range of properties. It’s quite fun to see what you can do with them.

Mesh line intersections in Grasshopper in C#

Many intersection checks are possible in C# in Grasshopper, although finding them isn’t entirely intuitive.

One task I wanted to do today was to see if a ray of light between one point and another was being blocked by a mesh. This requires a mesh-line intersection check – to check if the ray of light was being blocked by the mesh.

How to calculate an intersection

You can find a lot of intersection methods for different kinds of geometry under Rhino.Geometry.Intersection. The mesh line intersection is a good choice as it is one of the faster intersection checks – especially compared to anything involving surfaces.

To do the intersection check, we need our mesh and our ray. The ray can be a bit challenging to set up – it’s a common mistake to forget to realise that your line start and end points might be touching the mesh, which would lead to positive intersection results. This is why I’ve redefined my line to run from 0.001 to 0.999.

        //collision test
        var ln = new Line(e[em], centre); //ray
        var startpt = new Point3d(ln.PointAt(0.001)); //modify ray so start/end don't intersect
        var endpt = new Point3d(ln.PointAt(0.999));
        ln.From = startpt;
        ln.To = endpt;
        Int32[] intersections; //where intersection locations are held
        Rhino.Geometry.Intersect.Intersection.MeshLine(r, ln, out intersections);

        //calculate emission contribution and add to that receiver
        if(intersections == null)
        {
          //if no intersections, we can assume ray is unimpeded and do our calcs
          double contribution = Math.Cos(alpha) / (dist * dist);
          rtnvals[f] += Math.Max(contribution, 0);
        }

Area of a mesh face in C# in Grasshopper

Another quick script for handing meshes – this time to find the area of a mesh face.

This script is in C# and can be easily used with the C# component in Grasshopper. Copy the script into the ‘custom additional code’ section. It is written as a method, so you can easily call it. In the ‘RunScript’ section, call the method with something like:

double area = Area(3, myMesh)

This will return the area of the third face in the mesh called myMesh.

The method itself to calculate the area of a mesh face is below. Of course, you can use this method in any C# application, not just Grasshopper – you’ll just need to modify the code to fit whatever data structure your mesh uses.

  double Area(int meshfaceindex, Mesh m)
  {
    //get points into a nice, concise format
    Point3d[] pts = new Point3d[4];
    pts[0] = m.Vertices[m.Faces[meshfaceindex].A];
    pts[1] = m.Vertices[m.Faces[meshfaceindex].B];
    pts[2] = m.Vertices[m.Faces[meshfaceindex].C];
    if(m.Faces[meshfaceindex].IsQuad) pts[3] = m.Vertices[m.Faces[meshfaceindex].D];

    //calculate areas of triangles
    double a = pts[0].DistanceTo(pts[1]);
    double b = pts[1].DistanceTo(pts[2]);
    double c = pts[2].DistanceTo(pts[0]);
    double p = 0.5 * (a + b + c);
    double area1 = Math.Sqrt(p * (p - a) * (p - b) * (p - c));

    //if quad, calc area of second triangle
    double area2 = 0;
    if(m.Faces[meshfaceindex].IsQuad)
    {
      a = pts[0].DistanceTo(pts[2]);
      b = pts[2].DistanceTo(pts[3]);
      c = pts[3].DistanceTo(pts[0]);
      p = 0.5 * (a + b + c);
      area2 = Math.Sqrt(p * (p - a) * (p - b) * (p - c));
    }

    return area1 + area2;
  }

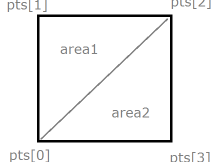
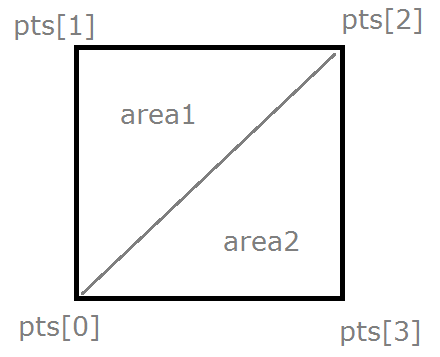
This script is based upon Heron’s Formula, which calculates the area of a triangle based upon knowing its three lengths. The script also calculates the area for quads. It does this by dividing the quad into two triangles.

mesh-area

C# code for getting the centrepoint of a mesh face in Grasshopper

A method I quickly wrote to get the centrepoint of a mesh face using the C# component in Grasshopper. More information about the mesh data structure used to generate this code is in this post.

The method essentially calculates the ‘average’ location of each of the 3 or 4 nodes on the mesh. (Formally, this is a simplification of the first moment of area.)

  Point3d CentrePoint(int meshfaceindex, Mesh m)
  {
    var temppt = new Point3d(0, 0, 0);

    temppt.X += m.Vertices[m.Faces[meshfaceindex].A].X;
    temppt.Y += m.Vertices[m.Faces[meshfaceindex].A].Y;
    temppt.Z += m.Vertices[m.Faces[meshfaceindex].A].Z;

    temppt.X += m.Vertices[m.Faces[meshfaceindex].B].X;
    temppt.Y += m.Vertices[m.Faces[meshfaceindex].B].Y;
    temppt.Z += m.Vertices[m.Faces[meshfaceindex].B].Z;

    temppt.X += m.Vertices[m.Faces[meshfaceindex].C].X;
    temppt.Y += m.Vertices[m.Faces[meshfaceindex].C].Y;
    temppt.Z += m.Vertices[m.Faces[meshfaceindex].C].Z;

    if(m.Faces[meshfaceindex].IsQuad)
    {
      temppt.X += m.Vertices[m.Faces[meshfaceindex].D].X;
      temppt.Y += m.Vertices[m.Faces[meshfaceindex].D].Y;
      temppt.Z += m.Vertices[m.Faces[meshfaceindex].D].Z;

      temppt.X /= 4;
      temppt.Y /= 4;
      temppt.Z /= 4;
    }
    else
    {
      temppt.X /= 3;
      temppt.Y /= 3;
      temppt.Z /= 3;
    }

    return temppt;
  }

It’s sloppy to have the code so repetitive, but the .A and the .X notation don’t make for good code efficiency. It’s sometimes possible to use temppt[d] where d = 0, 1 or 2 for X, Y and Z correspondingly (which would allow the use of a ‘for’ loop), but the mesh Vertices property returns Point3f instead of Point3d, which doesn’t allow this.

FastMesh for Grasshopper: A cluster to make fast, light meshes from curves

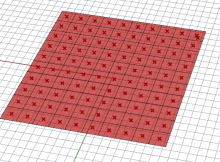
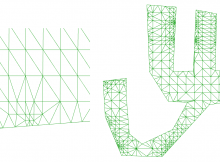
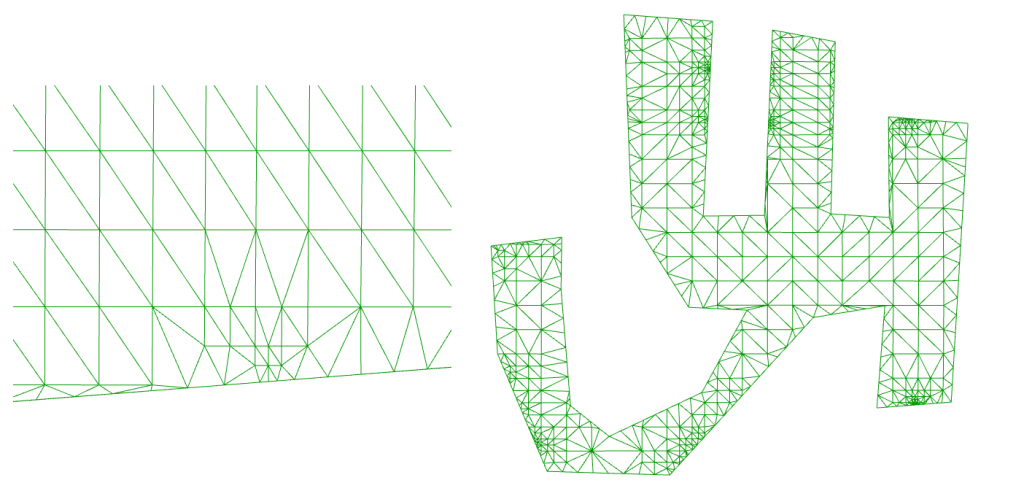
Creating a mesh from a curve can be challenging in Grasshopper. Most ways of doing it involve creating a surface and then meshing that surface. And once the mesh is made, it often has inconsistent face densities, with unusual points of high point density.

bad_mesh

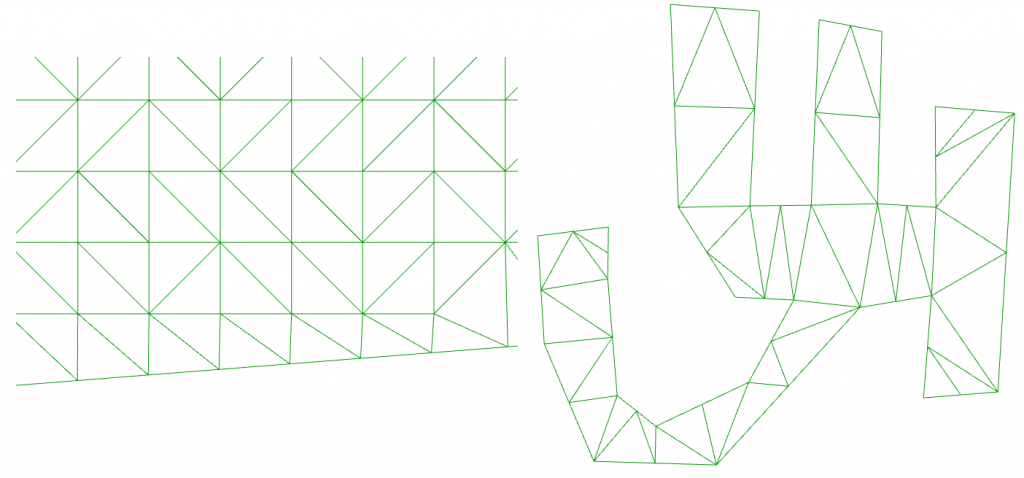
The mathematics behind these methds are fine for the general case (any closed curve in any alignment), but in cases where we have a planar polyline (i.e. no curved segments, such as a room or building outline) and where this curve lies in the XY plane, we can use a highly optimised algorithm.

FastMesh is my attempt. Simply connect a polyline (or list of polylines) and it will mesh those curves – without the heavy operation of creating intermediary surfaces. I have attempted to ensure that points are distributed evenly in a grid-like pattern (so it is suitable for creating analysis meshes for tools like Honeybee), and you can optionally control the distance between points by inputting a distance into ‘s’. If you leave ‘s’ blank (or set it to 0) it will create a mesh with a minimum number of faces, creating extremely light meshes, for example in creating buildings with Elk.

good_mesh

The principle of my method is that it generates a collection of mesh points, and removes any mesh points that don’t lie inside the curve. It then performs a Delaunay Triangulation on remaining points. For concave shapes, triangles will be formed that fall outside the curve, which are removed.

Grasshopper: Front and Centre for aligning legends to the Rhino Viewport

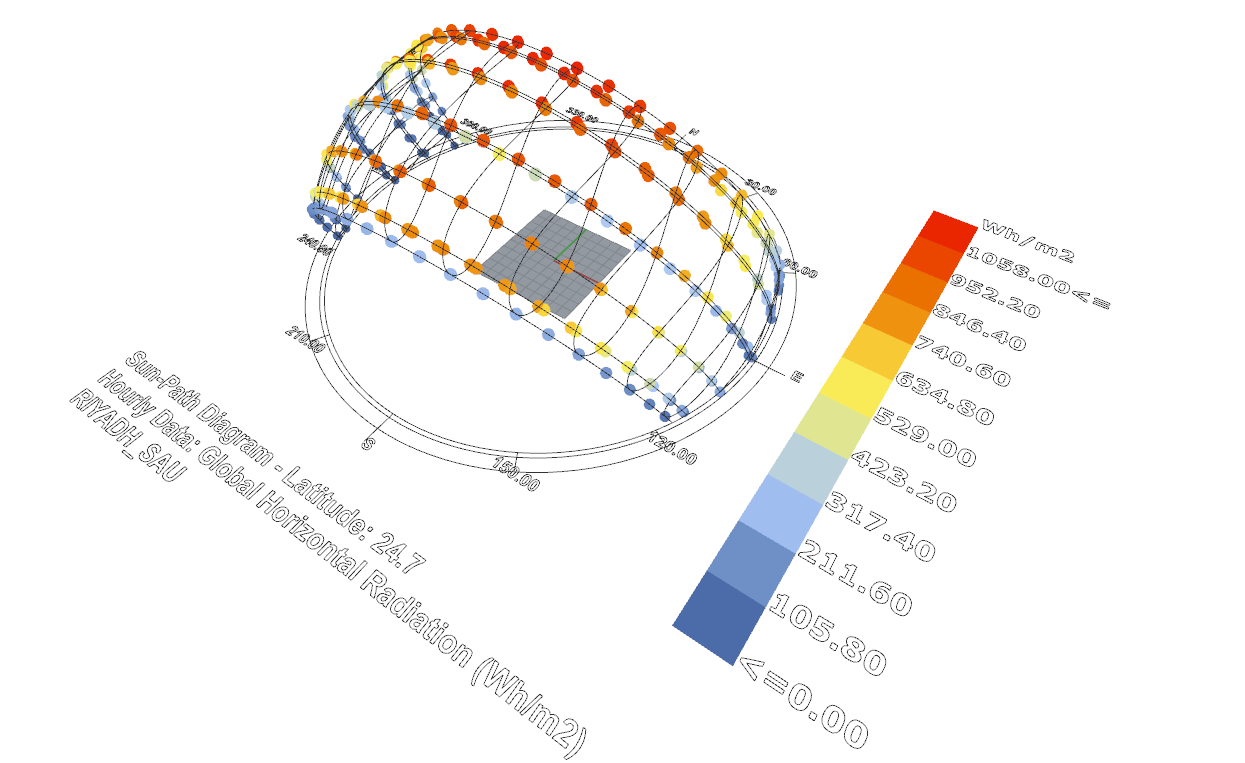
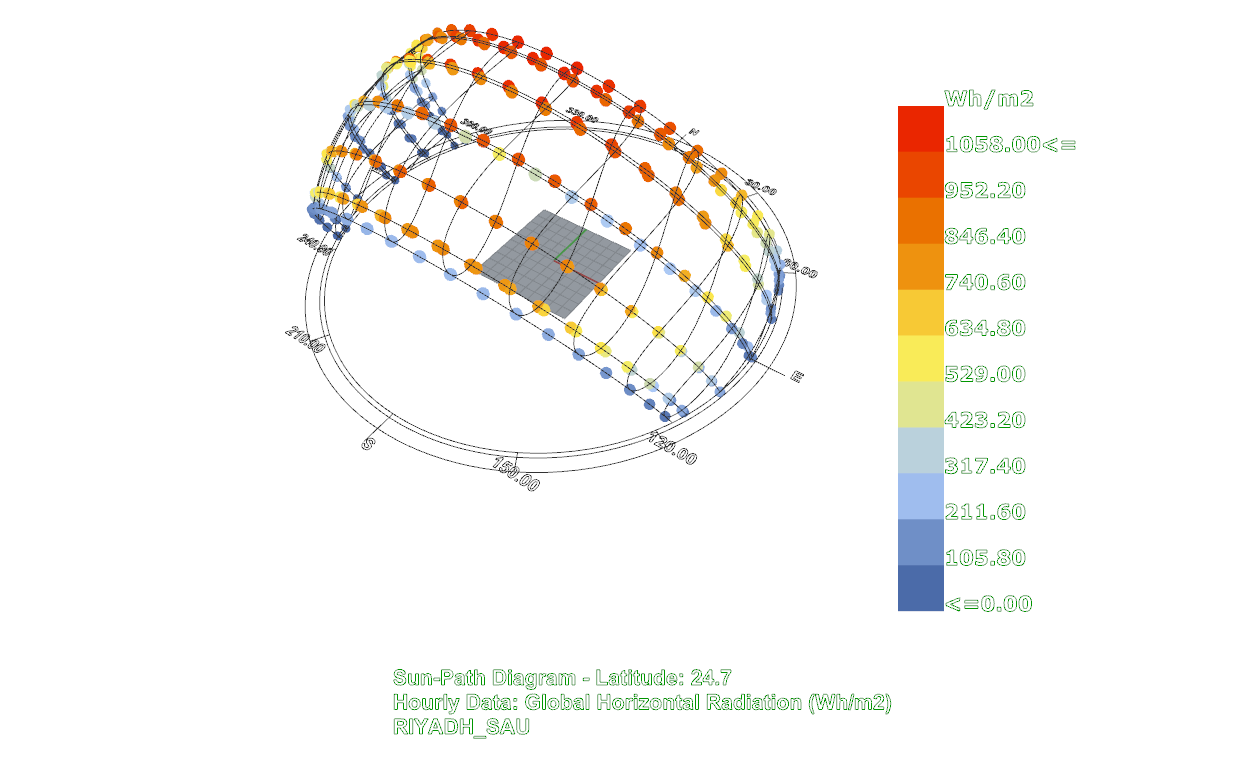
Grasshopper is a great way of creating legends and graphs beside your model, but how do you display them? You can use multiple viewports, but this is clumsy to set up. You could use Ladybug’s approach of keeping the legend close to your geometry in 3D space, but this means you have to move the viewport to inspect the legend.

legend1

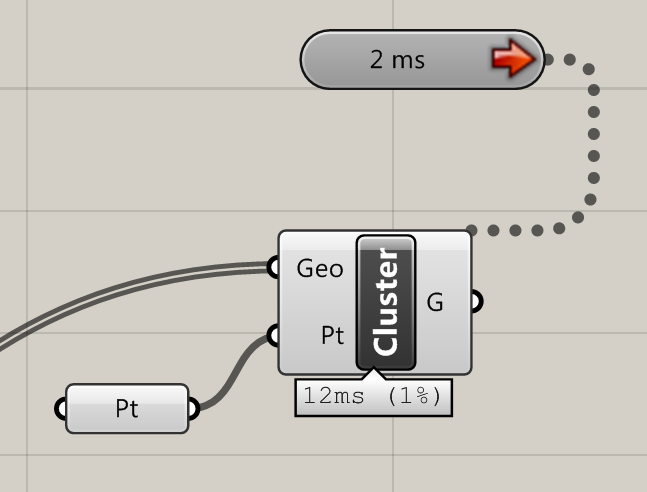
Front and Centre is a Grasshopper cluster which moves legends or any other geometry directly in front of the camera. Add a timer and the legend automatically follows the camera. It intelligently scales the geometry to fit within the screen, and you can customise the location by modifying a centre point.

legend2

To use, connect the legend or geometry you wish to display to ‘Geo’. Optionally, you can add a point to define the centre of your screen to ‘pt’. Both these should be located somewhere in the plane Z=0.

frontandcentre

A simple timer example for the Grasshopper C# component

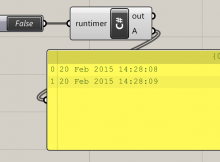
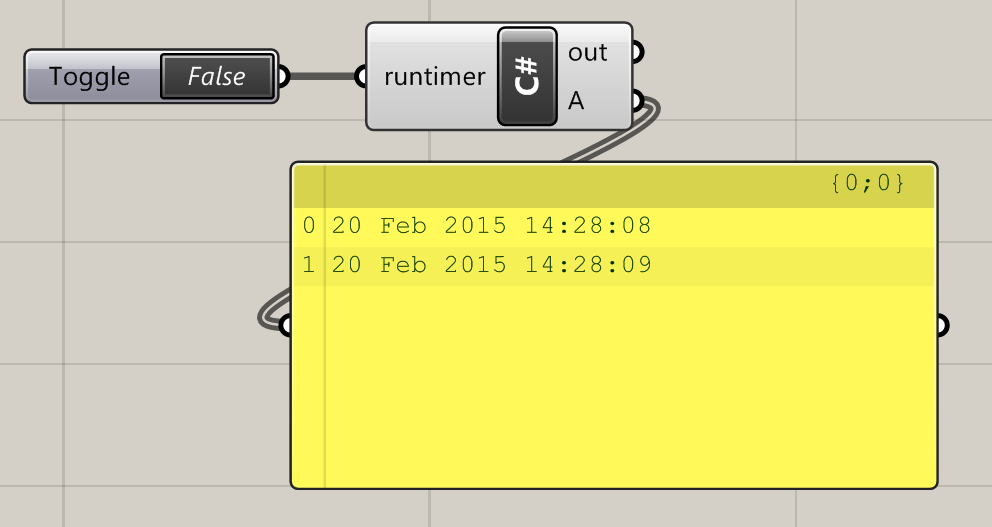
grasshopper-timer

Create a simple timer in Grasshopper using the built-in C# component with this example script.

What this does

Set runtimer to true. The component will build a list of the current time and date, once per second.

When runtimer is set to false, the timer is turned off and the list is displayed.

Code

  private void RunScript(bool runtimer, bool reset, ref object A)
  {
    if(runtimer) Example.TurnOnTimer();
    if(!runtimer) Example.TurnOffTimer();
    A = rtnlist;
  }

  // <Custom additional code> 

  public static List<string> rtnlist = new List<string>();

  public class Example
  {
    public static System.Timers.Timer aTimer = new System.Timers.Timer(1000);

    public static void TurnOnTimer()
    {
      rtnlist.Clear();
      aTimer.Elapsed += OnTimedEvent;
      aTimer.Enabled = true;
    }

    public static void TurnOffTimer()
    {
      aTimer.Elapsed -= OnTimedEvent;
      aTimer.Enabled = false;
    }

    private static void OnTimedEvent(Object source, System.Timers.ElapsedEventArgs e)
    {
      rtnlist.Add(e.SignalTime.ToString());
    }
  }

Download

You can download the above code as a Grasshopper user object here


Further information

MSDN guide: timers in C#

Grasshopper timer using Python

If you are looking to add a timer to a Python component without using the timer component, have a look at Anders Deleuran’s code here.

Set the Rhino camera with Grasshopper and C#

Setting the camera in Rhino can be a bit fiddly. Often, dragging and orbiting doesn’t give you the camera view you need. It is possible to manually set the camera using the ViewportProperties command, but even this often isn’t ideal.

However, it is surprisingly easy to set the Rhino camera with a few lines of C# code in Grasshopper. The key part is understanding how the Rhino camera works. The camera location is defined by a Point3d. In order to get the view direction, a second point is used, called the target. So if you want to ‘look around’, keep the camera location constant, and move the target. If you want to orbit around an object, keep the target the same and move the camera location. If you want to ‘walk’ (like in Sketchup) then you need to move the location and the target together.

To use the code below, create a C# component in Grasshopper. Copy the script below into the component. The snippet gets the camera in the selected Rhino viewport.

Get camera

private void RunScript(bool getcamera)
{
    //get current viewport    
    vp = doc.Views.ActiveView.ActiveViewport;
    //save camera location and camera target
    loc = vp.CameraLocation;
    tar = vp.CameraTarget;
}
// <custom additional code>

Rhino.Display.RhinoViewport vp; //used to get and set rhino camera properties
Point3d tar;
Point3d loc;

…and this one sets the viewport. You’ll need to set two Point3d inputs called loc and tar to take the user’s desired camera location and target points.

Set camera

private void RunScript(Point3d loc, Point3d tar)
{
    //get current viewport    
    vp = Rhino.RhinoDoc.ActiveDoc.Views.ActiveView.ActiveViewport;
    //set new camera
    vp.SetCameraLocations(tar, loc);
}
// <custom additional code>

Rhino.Display.RhinoViewport vp; //used to get and set rhino camera properties

These examples are of course very simple, but you don’t have to stop here. Once you’ve got the gist of it, this approach reveals not only the ability to manipulate the view but it allows a huge range of creativity. For example, I rendered OpenStreetMap data in Grasshopper and manipulated the camera to follow a road.

You can download the Grasshopper file to set the camera along a curve like the above video from here.