Restore a Mac with Windows installed to factory settings

Are you looking to wipe your Mac back to factory settings, and have a Windows installation you also want removing? This guide will show you how to restore a Mac back to its as-new state, with the Bootcamp Windows installation and its partition gone.

This will obviously remove all of your personal data, so make sure you’ve backed everything up you want to keep, because it will all be gone by the end. This is a drastic solution that I only recommend if, for example, you are selling your computer.

There is no one-click solution to wipe and restore your Mac. Instead, here are the steps you need.

This process assumes you have OS X Yosemite installed, though the process should be similar for other modern versions of OS X.

Step 1: Remove Windows

We can use Boot Camp Assistant to remove Windows first. This will remove the Windows partition, and restore your Mac back to its one-partition state. Your Mac data and istallation will be untouched, and the free space created will be added to the Mac partition.

Boot OS X. Run Boot Camp Assistant. Click through to the following screen.
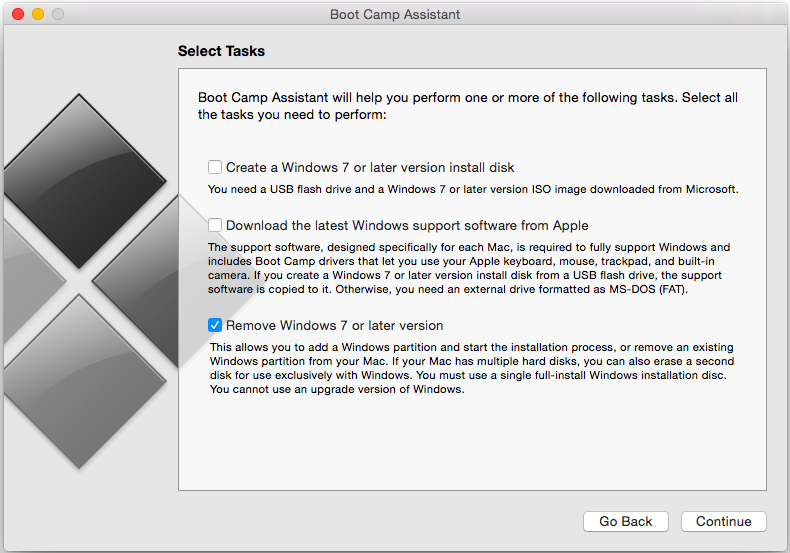
Boot camp remove windows installation option

Select Remove Windows 7 or later version and click Continue.

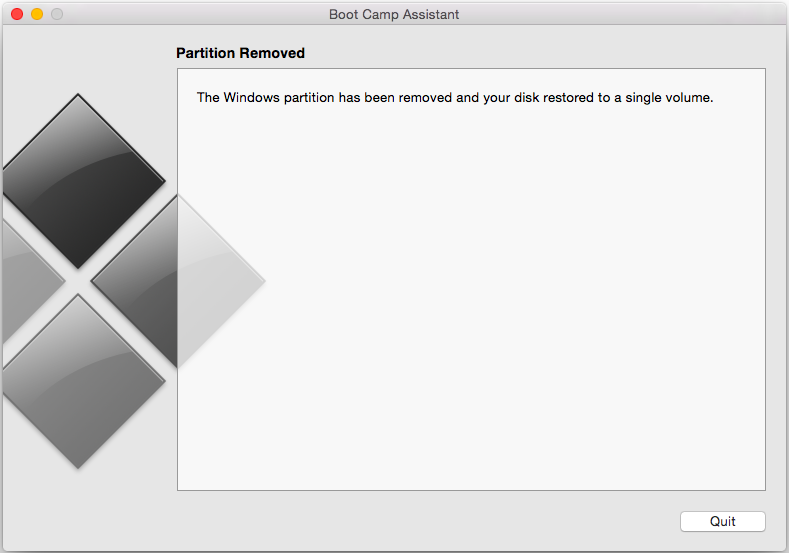
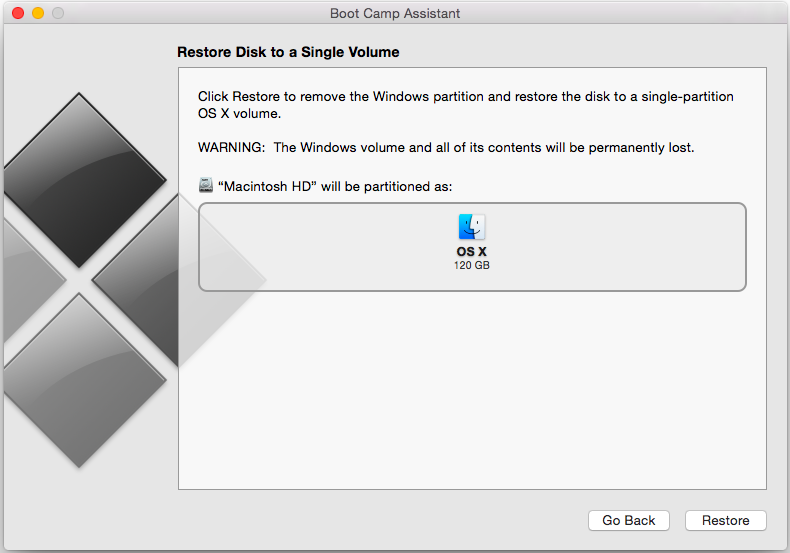
The next screen should show how your hard drive will look once the Windows partition has been returned to the Mac partition. Click Restore.

Screen Shot 2016-05-11 at 14.13.33

This should not take long – it took seconds on my Air.

Screen Shot 2016-05-11 at 14.14.52

And that’s it! Windows is now gone.

Step 2: Erase your Mac partition

We want to force OS X to do a clean installation, not to just ‘repair’ or ‘restore’ itself. The best way to do this is to erase OS X and then re-install it.

Erasing your partition is quite safe – you’re not going to brick your machine. This is because your Mac should have a separate hidden ‘recovery’ partition, so even when you erase your Mac partition, your computer will still be able to re-install itself with a fresh copy of OS X later on.

To erase your Mac partition, restart your computer, and hold Cmd+R while it restarts. The following screen should appear:
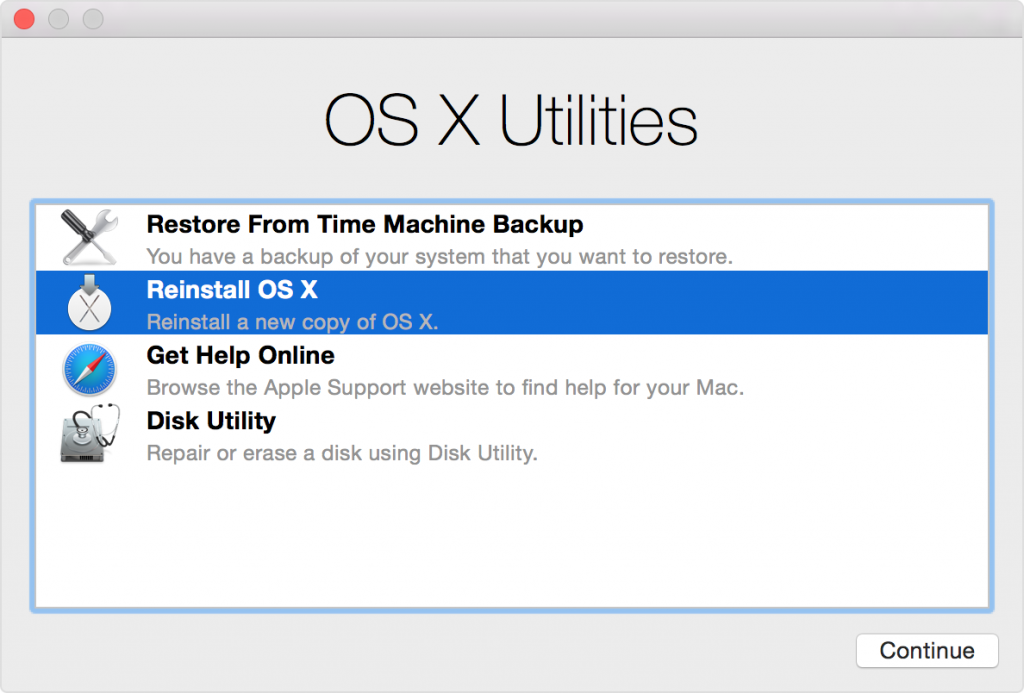
yosemite-restart-recovery_mode-reinstall_os_x-1188x804

Select Disk Utility.

On the left, select your Mac partition – i.e. the partition where OS X is installed. Select the Erase tab towards the right. Then, under Format, select Mac OS Extended (Journaled). Finally, click Erase.

This should only take a few seconds. Once finished, we can then install a clean copy of OS X on our Mac partition.

Step 3: Reinstall OS X

You will need an internet connection for this, as OS X will be downloaded as it installs. (Older versions of OS X may require physical media.) You will also need your Apple ID.

Quit the Disk Utility. You should be returned back to the OS X Utilities screen from above. Select Reinstall OS X.

Click through the next few windows. Then, the process should start. On my (not very fast) connection, it took a few hours to download and reinstall OS X.

Done!

The installer should automatically restart your Mac once finished.

Having problems? Here are a few guides that explain the process in more detail:

Digital Trends: How to restore a mac to factory settings
BleepingComputer.com: forum post
MacWorld: How to restore your Mac
Apple support: remove Windows from your Mac
Using AutoHotKey for accelerated scrolling in Windows/Bootcamp

There exists already a third party driver for BootCamp to improve upon the terrible drivers for the trackpad in Windows provided by Apple. It’s called Trackpad++ and attempts to provide some of the key trackpad actions that Mac users have come not to be able to live without.

But, to be honest, it’s not the solution I was looking for. The accelerated scrolling does not feel anywhere as natural as on a Mac (or even my Chromebook for that matter) and many of the better shortcuts are still absent. There are some settings available in Trackpad++ but they’re too simplistic and don’t allow the level of control I feel that I need. To top it off, the free version must be reinstalled every week (a passive-aggressive technique to encourage you to pay) and I can’t bring myself to actually pay for software that doesn’t actually solve the problem I’m trying to solve. Which is a shame really.

Trackpad++ is the only software out there that attempts to completely re-write the driver, but are there any other ways of getting the trackpad’s functionality back? I’ve been investigating using AutoHotKey to simply use Apple’s driver in Windows more effectively. Two features that I miss are accessing middle-click with the trackpad – something I addressed in this post – and the other is accelerated scrolling. This is where, if you scroll quickly, the speed of scrolling also increases, making it easier to navigate long pages without having to use the scroll bar. Done right, as on OSX and ChromeOS, it feels very natural and you don’t even realise that the scroll is accelerated. Get used to this and move back to Windows with its non-accelerated scrolling, and it feels like you’re browsing the web through treacle. This is very annoying!

With my perceived failure of Trackpad++ in solving this problem, my search has yielded an alternative, using AutoHotKey.

http://www.autohotkey.com/board/topic/48426-accelerated-scrolling-script/

Download the ZIP file and extract it. There is an EXE if you don’t have AutoHotKey installed – it’s as easy as running this EXE to get accelerated scrolling. There is also the AHK source file that you can run with AHK – this is the version I recommend if you want to tweak the code.

Thoughts? It still doesn’t feel amazing – the acceleration seems to kick in unpredictably, like only a small difference in scrolling speed will take you between half a page down, and to the bottom of the page. If using BootCamp, I recommend going into the mouse settings in the control panel, and setting the scroll wheel to scroll 1 line per notch, otherwise it feels far to fast. It also lacks the ‘momentum’ on ChromeOS/OSX (where the page keeps moving and gradually slows down when you have stopped scrolling).

But the fact that it is an AHK file means that I can play with it and improve it. Out the box, it is already quite acceptable, and I’m looking forward to finding the time to make it work even better. Added to the fact that AHK is in principle much safer than allowing someone’s third party drivers to worm its way into the core of your fragile Windows system, this is definitely the path I would sooner recommend.

A trackpad middle-click hack for Bootcamp/Windows using AutoHotKey

A great feature of both my Mac and my Chromebook is that middle-clicks are built into the trackpad by tapping with 3 or 4 fingers at once. But in Bootcamp (and with most Windows trackpads too) there is no equivalent to a triple-finger tap built into the drivers. Among many uses, the middle click is a dead easy way of closing tabs in Chrome without worrying about that fiddly tiny little close button – a feature I miss when using Windows.

To solve this, it’s AutoHotKey to the rescue! Credit to Lifehacker reader Nakul – I have a slightly modified the script to turn a double-right-click into a middle click. Note that this might not be suitable if you use applications that have specific actions for double-right-clicks, but for the vast majority of people this shouldn’t be an issue.

~RButton::
If (A_PriorHotKey = A_ThisHotKey and A_TimeSincePriorHotkey < 500)
{
Click middle
}
Return

Simply install AutoHotKey, right click on the notification icon by the clock, click ‘Edit This Script’ and paste the above code. Save the notepad file and then reload the script.

The way that the script works is that, whenever the right mouse button is pressed, the code on the second line is called. If the code is called twice in a row, with 500ms between each call, then it simulates a middle-click. You can change the 500 value to a higher or lower value (in milliseconds) if you prefer.

To use the script with a trackpad, do a two-finger tap (as you would normally do for a right-click) twice quickly. It might make the right-click menu appear, but the second right-click should make it hide again.